
In the previous topic, we have learnt about what is migration in Magento 2 and the requirements of this migration. As referred in last topic, to do a migration properly, we need a tool called Magento Data Migration Tool. The tool is a command-line interface creating by Magento developers to provide progress logging, tracking and testing functions. But first, we need to understand the installation of Magento Data Migration tool.
One step before beginning the installation
First, we need to revise about the term defined in Data Migration Tool, which consists of three basic modes of operation:
1, Settings: Migrate all feasible system configuration and website-related settings from Magento to Magento 2.
2, Data: Migrate data from your Magento 1 database assets in bulk to your Magento 2 database.
3, Delta: Migrate incremental changes after the initial bulk data migration.
Each mode features several steps that perform specific tasks. Their steps can be seen in config.xml as
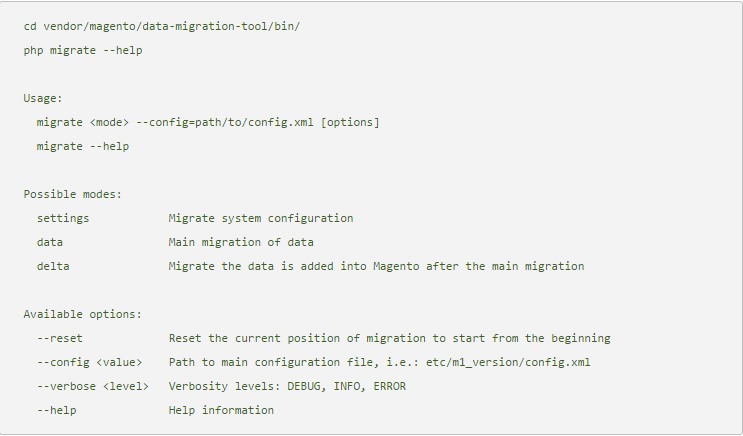
The file will be created after log in to your Magento server and in the directory
`<your Magento 2 install dir>/vendor/magento/data-migration-tool/etc/<migration edition>/<ce or version>
Then enter the following command
cp config.xml.dist config.xml
_ Open config.xml using a text editor like NotePad ++. Specify the following at minimum:
<source version=”1.9.1″>
<database host=”localhost” name=”magento1″ user=”root”/>
</source>
<destination version=”2.0.0.0″>
<database host=”localhost” name=”magento2″ user=”root”/>
</destination>
_ Optional boxes:
- Database server password: password=<password>
- Table prefix: <source_prefix>, <dest_prefix>
_ If your database owner’s user name is “root” with password “pass” and you use the prefix magento1 in your Magento 1 database, then the following in config.xml will be:
<source version=”1.9.1″>
<database host=”localhost” name=”magento1″ user=”root” password=”pass”/>
</source>
<destination version=”2.0.0.0″>
<database host=”localhost” name=”magento2″ user=”root”/>
</destination>
<options>
<source_prefix>magento1</source_prefix>
</options>
_ Save your changes to config.xml in NotePad ++.
Required conditions that must be prepared before performing the download and installation of Data Migration Tool:
_ First, set up a Magento 2 system meeting your system requirements.
_ Second, do not start any Magento 2 cron jobs.
_ Third, back up or dump your Magento 2 database after installation as soon as possible.
_ Don’t forget to check if the Data Migration tool has a network access so you can connect both the Magento 1 and Magento 2 databases. Then allow access in your firewall in case the migration tool is unable communicate with the databases. One advice is that you should replicate your Magento 1 database in order to provide redundancy in the event of unexpected issues.
_ Finally, prepare to migrate Magento 1 extension code to Magento 2.
Until you finish preparation all conditions, the next step is to download Data Migration tool and install it.
How to install Data Migration Tool
The Data Migration tool is available to be downloaded in two sources, and each needs few separate steps. We will guide you how to download and install this tool in both GitHub repository and packages.magento.com.
1, Install the tool through GitHub repository
You can easily download the latest version of Data Migration Tool here. As you can see, the latest version will always be announced on top of the page as well as have a green box named “latest release” like this

Now is the time to install the Data Migration Tool, you must follow these steps:
_ Log in to your Magento 2 server in order to write to the Magento 2 file system or switch to the Magento file system owner.
_ Switch to Magento 2 root directory and make a folder named “migrate_data_tool” in your web root like this
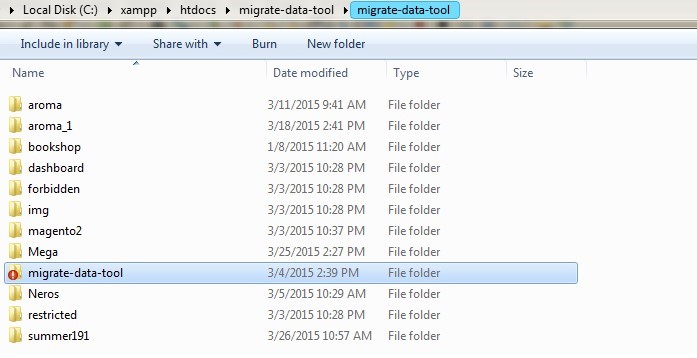
_ Then extract all source code from downloaded file to the folder “migrate_data_tool” you have just created. Remember to allow permission of administration for folder at:
>>> PATH_TO_YOUR_WEB_ROOT_FOLDER\migrate-data-tool\assets
>>> PATH_TO_YOUR_WEB_ROOT_FOLDER\migrate-data-tool\protected\runtime
And for file config.xml at:
>>> PATH_TO_YOUR_WEB_ROOT_FOLDER\migrate-data-tool\protected\config\config.php
_ Now you need to open your browser and access to your Data Migration in localhost path using this URL: http://localhost/migrate-data-tool/
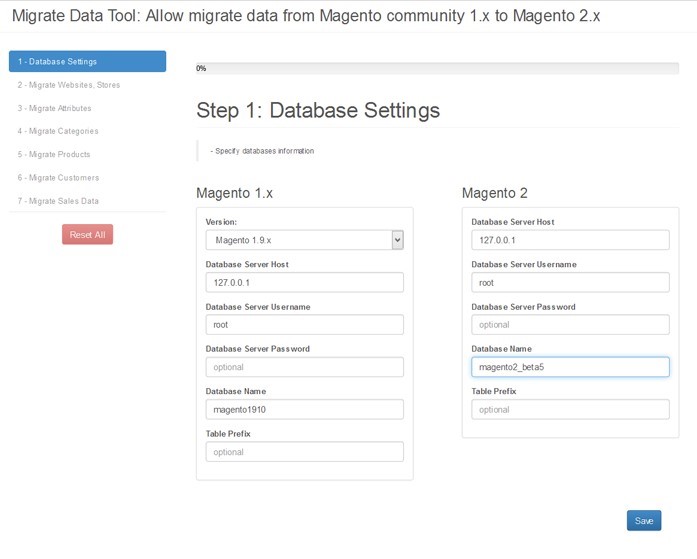
There are many boxes need filling as below:
+ Version: choose the version of both Magento
+ Database Server Host: type the database server host name, generally both will be the same.
+ Database Server UserName: choose the username of database server.
+ Database Server Password: choose the password of database server, this choice is optional.
+ Database Name: type the name used for the database.
+ Table Prefix: identify the table prefix, it is also optional.
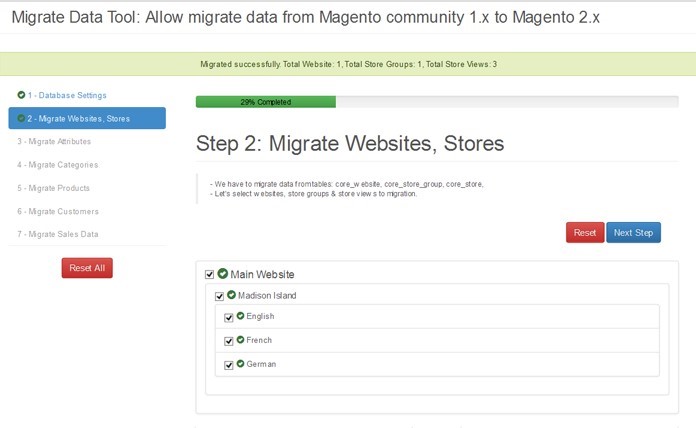
_ Next step will be easy as you just need to press the “next step” button to migrate necessary data from Magento to Magento 2.
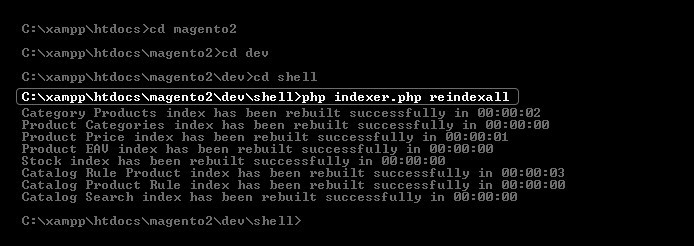
_ The next step requires open the cmd window and go to the folder PATH_TO_YOUR_WEB_ROOT_FOLDER\your_magento2_folder\dev\shell\, then type in the command line: “php indexer.php reindexall” to reindex all data in your Magento 2 website. The process is like this:
Replace the folder at PATH_TO_YOUR_WEB_ROOT_FOLDER\your_magento2_folder\pub\media\ with the folder at PATH_TO_YOUR_WEB_ROOT_FOLDER\your_magento1_folder\media\catalog
And the folder at PATH_TO_YOUR_WEB_ROOT_FOLDER\your_magento2_folder\pub\media\ with the folder at PATH_TO_YOUR_WEB_ROOT_FOLDER\your_magento1_folder\media\downloadable
_ Enter the following commands composer.json in the at Magento 2 root directory
composer config repositories.data-migration-tool git https://github.com/magento/data-migration-tool-ce composer require magento/data-migration-tool:dev-master
_ Wait while dependencies are updated.
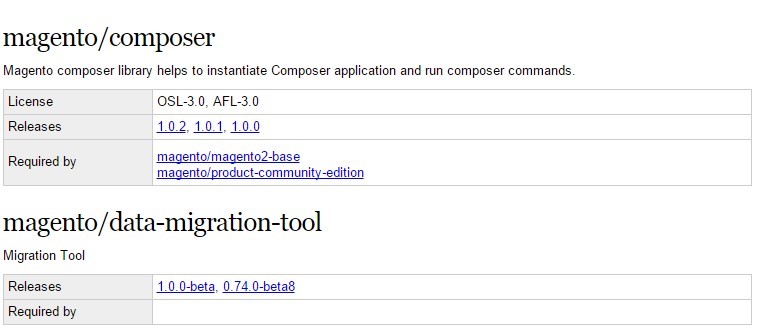
2, Install the tool from packages.magento.com
First you must update composer.json in the Magento root installation directory so the location of the Data Migration Tool package may appear. Download the latest version from here.
To update composer.json:
_ Log in to your Magento 2 server in order to write to the Magento 2 file system or switch to the Magento file system owner.
_ Go to Magento 2 root directory and add the following command line to Magento packages in composer.json:
composer config repositories.magento composer
Like this:
![]()
_ Enter the following command to require the current version of the sample data package:
composer require magento/data-migration-tool:<version>
where <version> is either an exact version or next significant release syntax. The example of exact version is
composer require magento/data-migration-tool:0.74.0-beta4
and next significant release example:
composer require magento/data-migration-tool:~0.74.0-beta4
_ Wait until dependencies finish being installed.
After the installation of Magento Data Migration Tool, the mapping and configuration files will be in the directory: <your Magento 2 install dir>/vendor/magento/data-migration-tool/etc/ce-to-ce for the scripts and configuration migrating from Magento CE to Magento 2 CE, <your Magento 2 install dir>/vendor/magento/data-migration-tool/etc/ce-to-ee for the scripts and configuration migrating from Magento CE to Magento 2 EE, <your Magento 2 install dir>/vendor/magento/data-migration-tool/etc/ee-to-ee for the scripts and configuration migrating from Magento EE to Magento 2 EE. Now you are one step closer to Magento 2, you just need to do the last step of migration and you can download Magento 2 extensions to further enhance the function of your own store.
-> If you want to read about the requirements of migration to Magento 2, feel free to read the previous topic.
-> Next topic will be about the process which Data Migration Tool migrate the three basic modes.
")


2 Comments
The migration process can be done in a local environment ? and then upload files and DB to hosting server? Or it needs to be done in the hosting servers directly?
How do you find these path??
>>> PATH_TO_YOUR_WEB_ROOT_FOLDER\migrate-data-tool\assets
>>> PATH_TO_YOUR_WEB_ROOT_FOLDER\migrate-data-tool\protected\runtime
And for file config.xml at:
>>> PATH_TO_YOUR_WEB_ROOT_FOLDER\migrate-data-tool\protected\config\config.php