
The Multi-Source Inventory is a big step of Magento to help merchants on handling their inventory activities conveniently.
However, store owners and warehouse staff still lack the tool to process advanced inventory operations such as stock taking, stock adjustment, stock transfer, etc. on Magento MSI.
This article will shed light on some options to implement inventory transfer in Magento MSI.
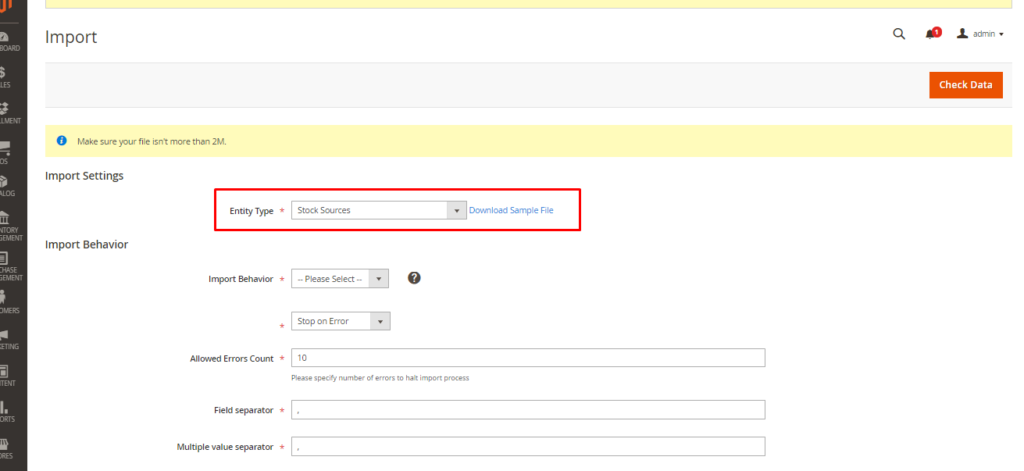
Option 1: Importing CSV file to update stock in Magento MSI
Transferring items from one source to another means decreasing stock level in the sending source and increasing stock in the receiving source at the same time.
Thus, you can use Magento’s CSV importing feature to update product quantities directly in both sources.
Option 2: Utilizing Bulk Inventory Transfer in Magento MSI
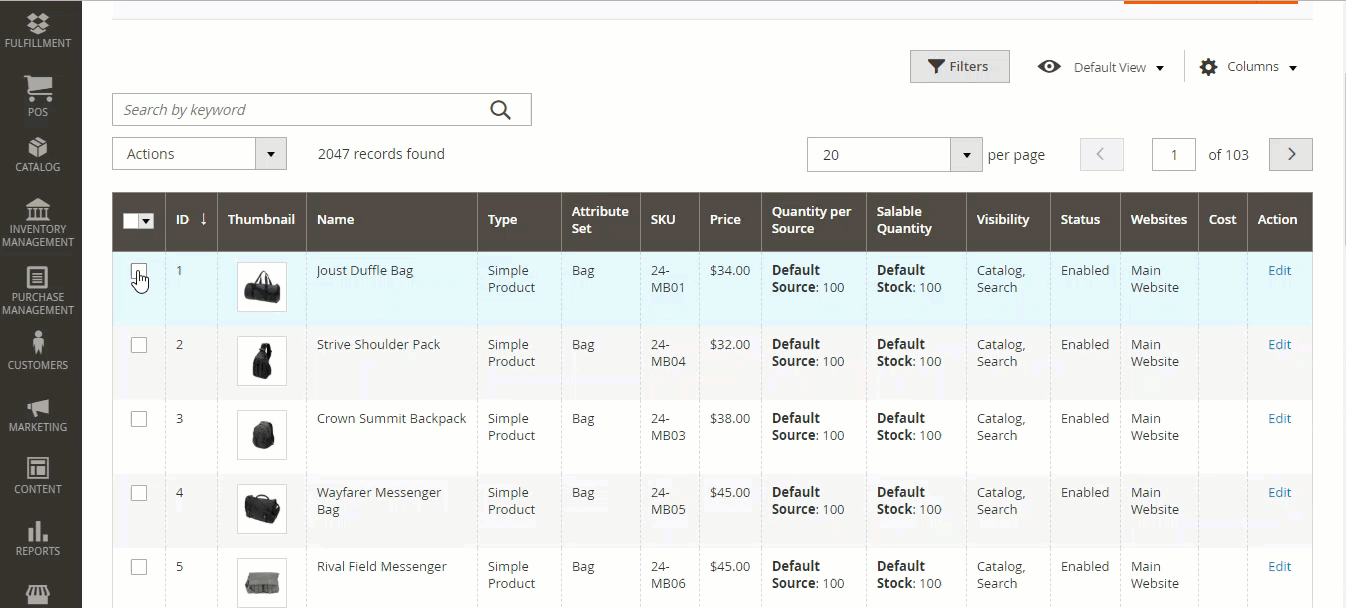
With Bulk Inventory Transfer, you can transfer products in mass from the sending warehouse to the receiving warehouse. This feature allows you to move all product quantities to a new warehouse at once.
This is a good option if you want to move all item quantities to another location. This might be because you don’t want to use this warehouse for fulfillment, or you want to close the warehouse.
For example, there are 5 items X in source A1 and 0 items X in source A2. Transferring Inventory in mass helps the merchant transfer all quantities of item X from source A1 to source A2. As a result, there are 0 items X in source A1 and 5 items X in source A2.
To transfer inventory:
Step 1 Go to Catalog> Select the Items you need to transfer with the tick boxes
Step 2 Select Transfer Inventory to Source in the dropdown Action> Click OK
Step 3 Select the source to send in Transfer from source
Step 4 Select the source to receive in To source
Step 5 Tap Inventory transfer to confirm
However, in the example above, if the warehouse staff just wants to transfer 3 items instead of 5, using the default Magento MSI feature is not enough. This option only lets merchant transfer all the quantities, so transferring a custom amount is impossible.
Option 3: Using Magestore solution
Continuing our success in Magento-native inventory solution for version 2.2.x, we have completed the inventory transfer feature in our POS Enterprise edition for Magento 2.3. Magestore solution offers separated send & receiving process for a flexible quantity, optimizing stock transfer activities.
Let’s get started…
Send stock
Step 1 Select Source to send and Source to receive
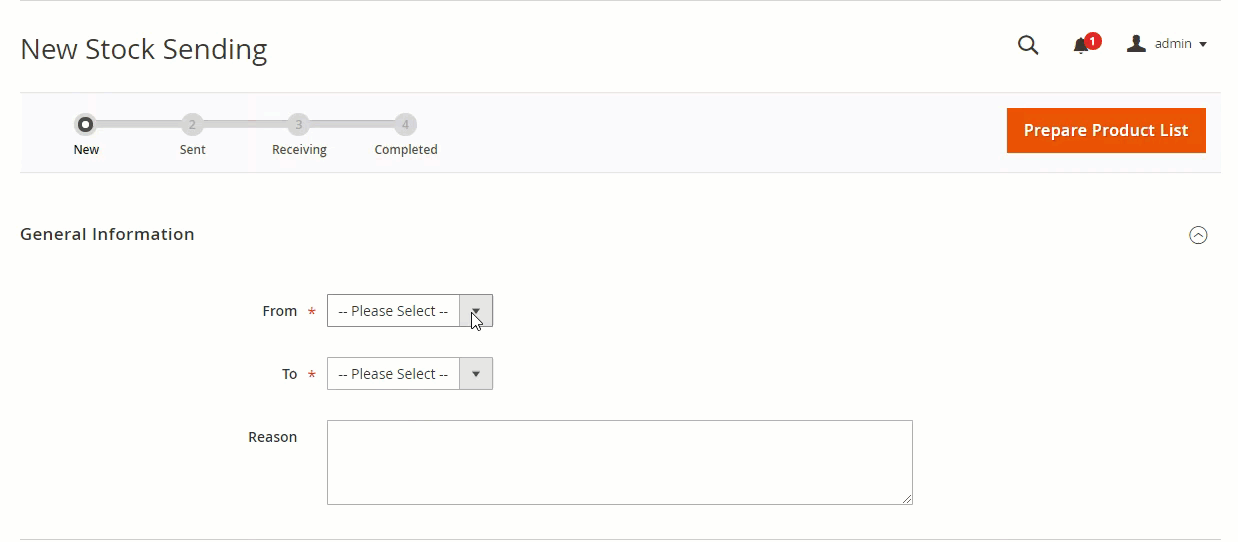
Inventory transfer- Select Source to send and Source to receive in Magento MSI by Magestore
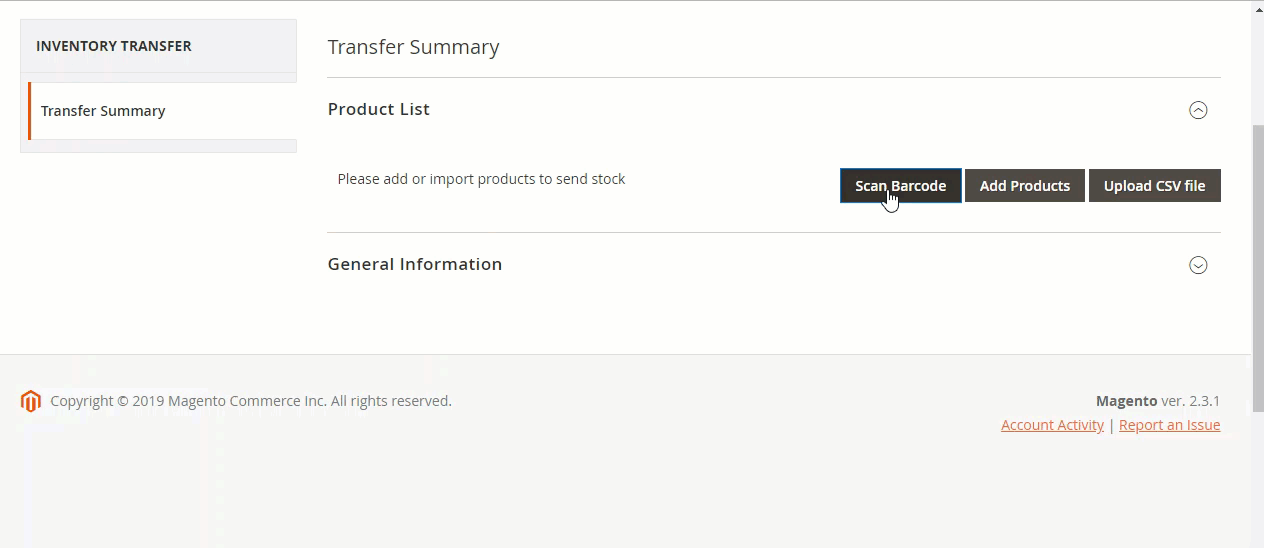
Step 2 Prepare product list to send
- Option 1. Scan barcode
Magestore inventory solution utilizes barcode for product management. If you’re already handling items through barcode, this is a suitable option to save effort and time to identify the right items.
Inventory transfer- Scan barcode to select items in Magento MSI by Magestore
Note: To send items to another source, you need to ensure the barcode you scan already exists in the system, especially in the sending source.
After scanning items successfully, the system shows a list of product to send. In this grid, the admin needs to fill in the quantity to send.
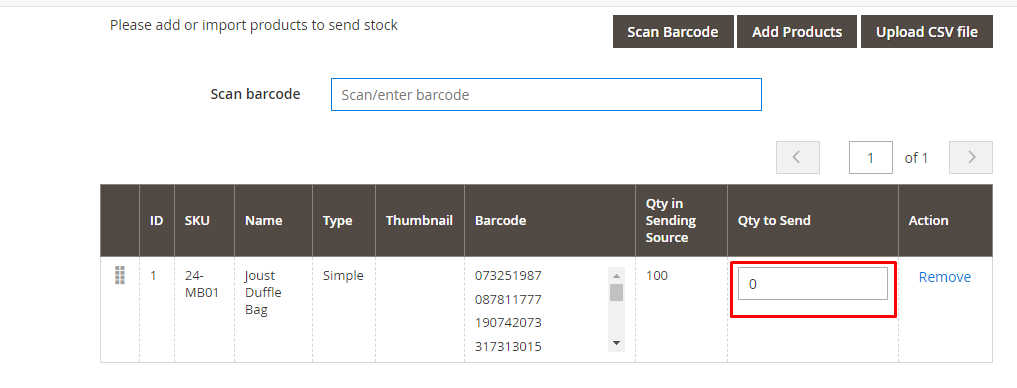
Note: Quantity to send must be greater than or equal to 0. Also, it has to be lower or equal to the current physical quantity in the sending source.
- Option 2. Select items Manually
If you can easily identify the name, type, SKU of items to send, this is a good option. After clicking Add products button, the system shows all items in the sending source available for transfer.
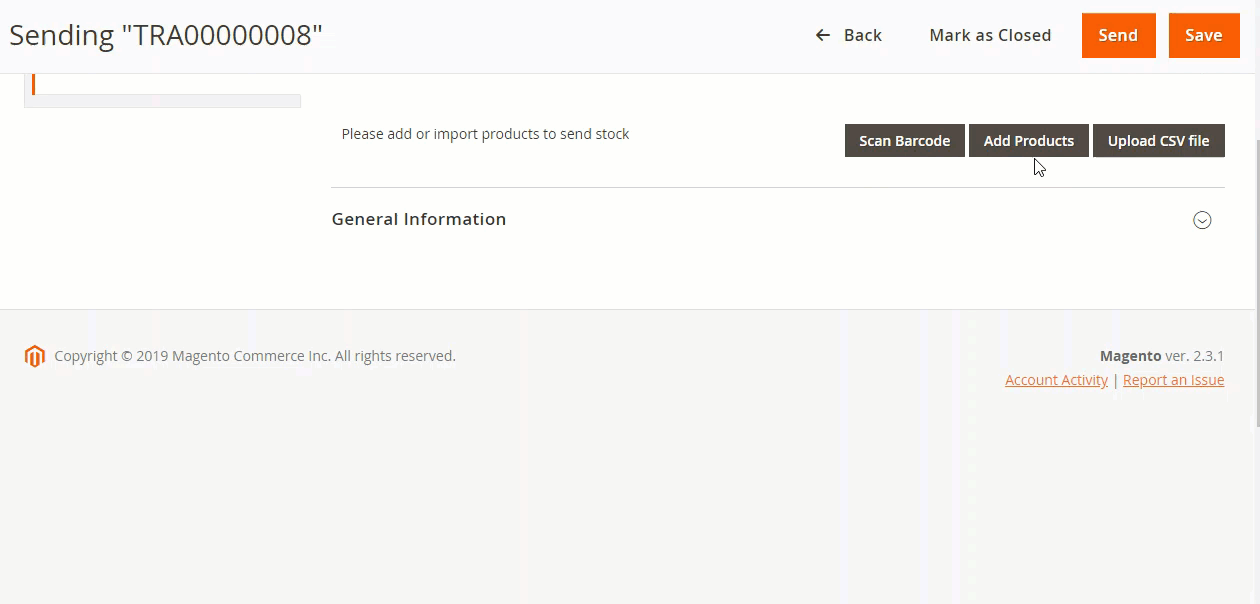
- Option 3. Upload a CSV file
If you need to move a lot of stock from one warehouse to another, you can add items by uploading a CSV file.
This helps you create large stock transfers quickly. If there are errors during the upload, the system will create a CSV file with all the invalid SKUs. You can download, correct, and upload this file back to Magento.
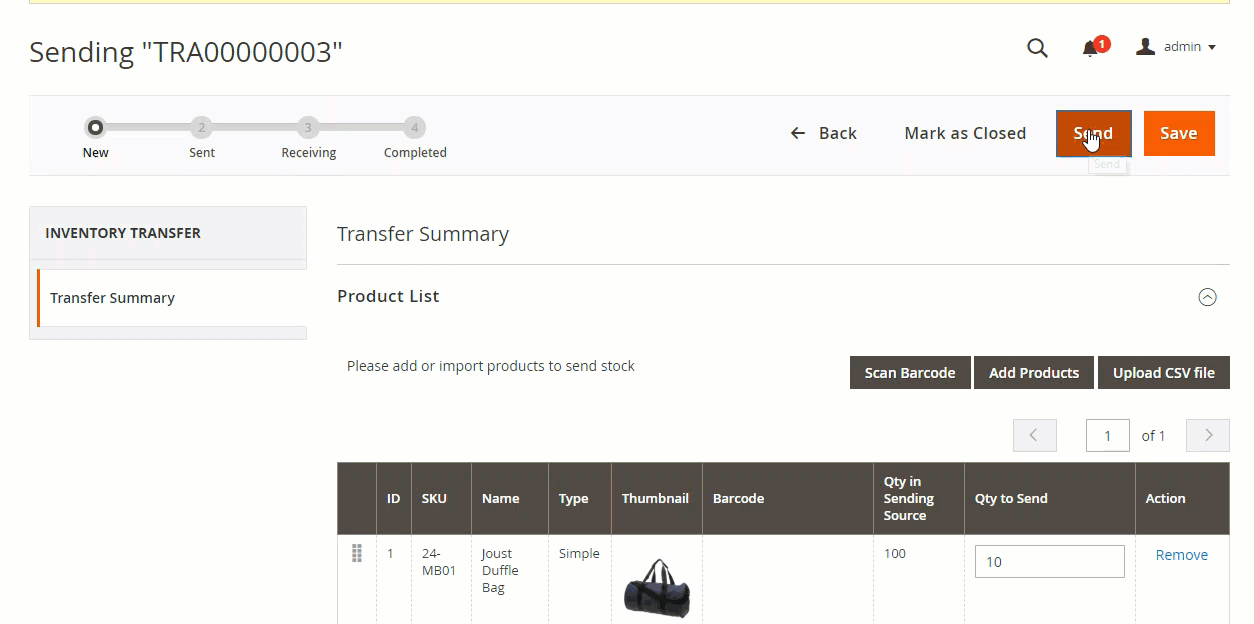
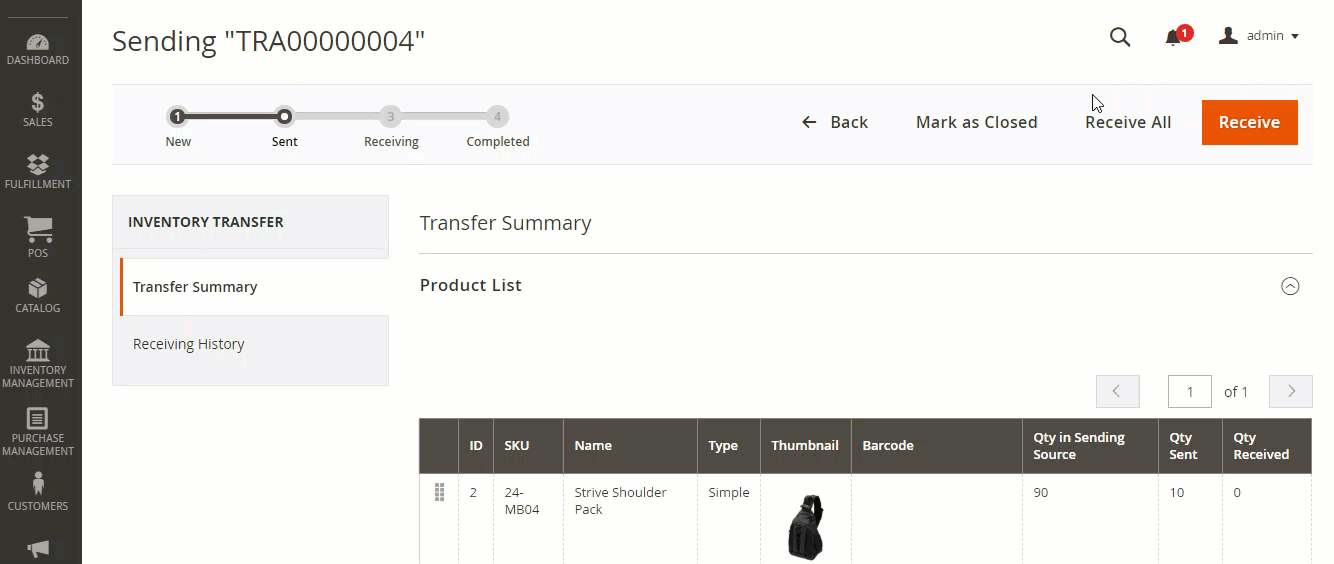
Step 3 Confirm stock sending
If you are ready to deliver, tap Send button to confirm inventory transfer. After hitting this button, the quantity in sending source will decrease immediately.
2. Receive stock
There are two options allowing you to receive items Receive all and Receive partially.
Receive all at once
You can receive all products from the sending source by selecting Receive all.
Receive partially
In some situations, goods are delivered by different drivers, so they can arrive at different quantities and times. In this case, the warehouse staff needs to have separated receiving records.
Here’s how to receive items partially:
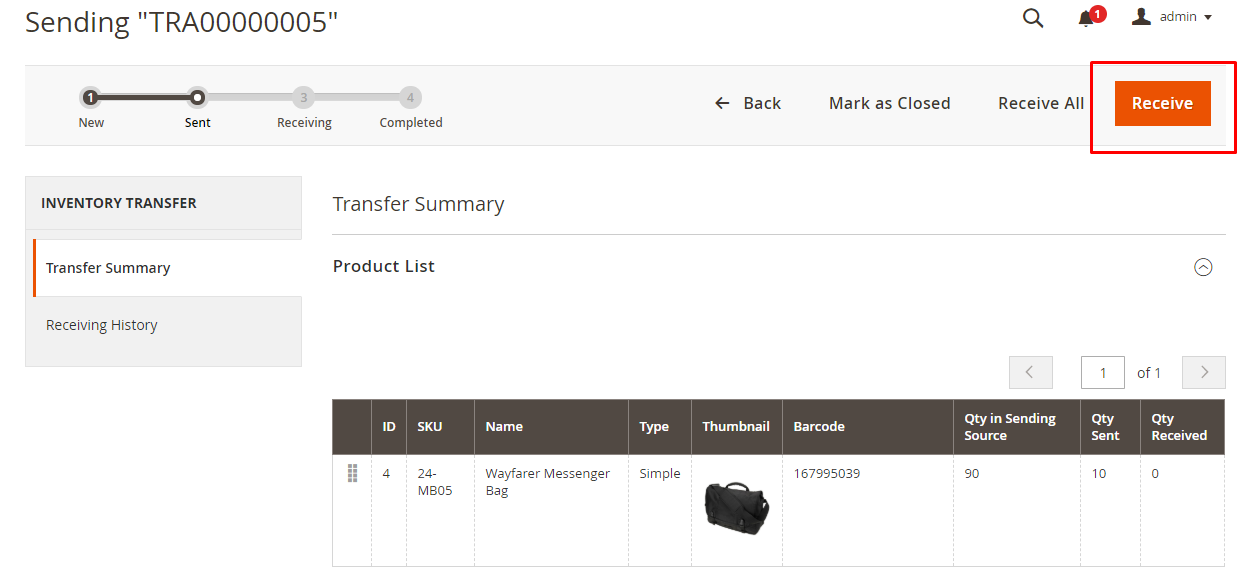
Step 1 Go to Transfer request> Tap Receive
Step 2 Select items to receive items by Scan barcode or Add product manually and input Quantity to Receive
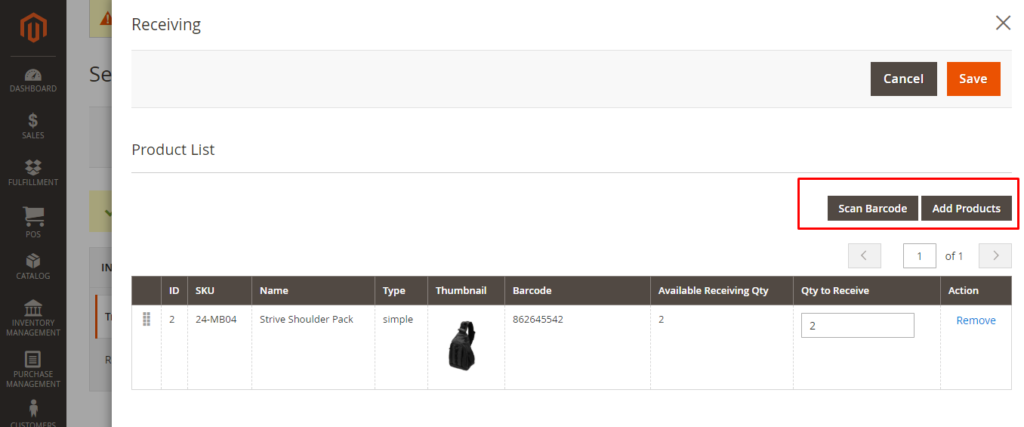
Note: You can just receive items sent from the sending source, and the received quantity cannot exceed the sent quantity.
Step 3 After reviewing the product list, you can click Save to receive items. As a result, the quantity of these items will increase in the destination source.
History tracking
1. Transfer History
On the Inventory Transfer screen, you can easily view a list of transfers and search for the record you need with filters.
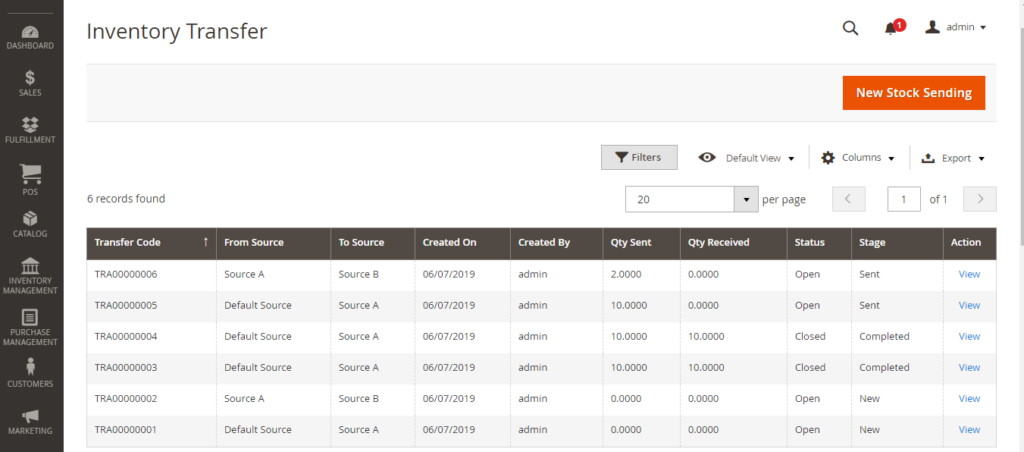
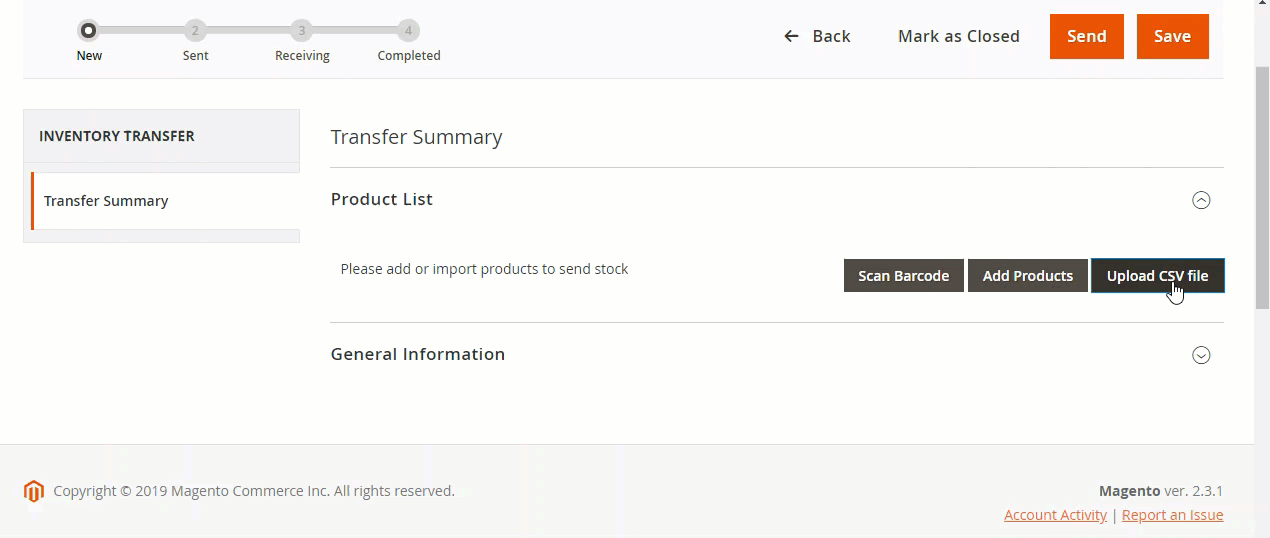
Tip: An inventory transfer record in the system will go through 4 stages:
- New – Preparing product list
- Sent – Sending items
- Receiving – Receiving items
- Completed – All items have been received
In case you need to continue sending or receiving, filtering the list by transfer stage helps you quickly find the record you want.
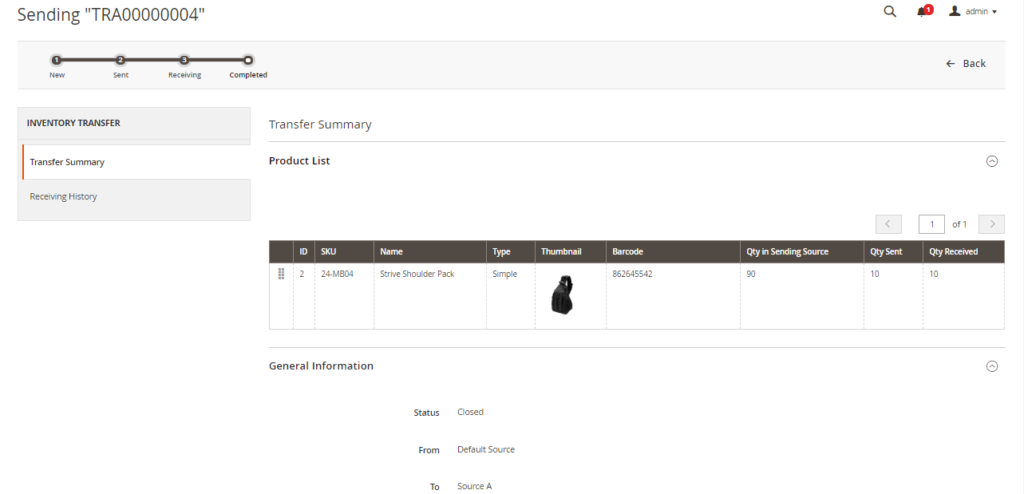
2. Transfer Summary
The Transfer Summary tab gives you an overview of which and how many items were sent and received. Also, you can export the list of items in the transfer summary to use when necessary.
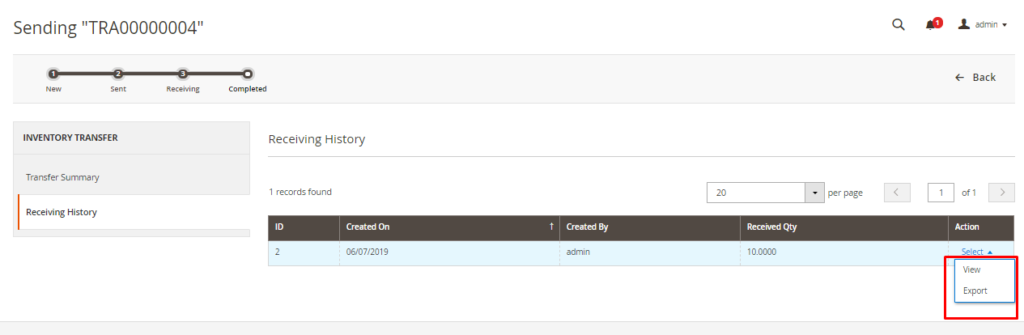
3. Receiving List
In this section, the system shows you the history of receiving. In addition, you can view and export the product list’s CSV file in each receive.
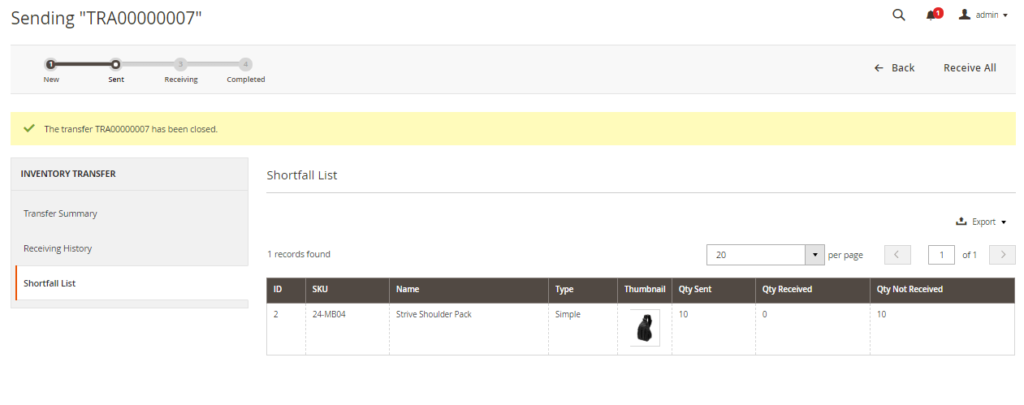
4. Shortfall List
During sending and receiving, there can be some problems that prevent you from receiving all the goods. For example, goods are lost or broken during shipping. Thus, the system allows you to close the receiving by clicking Mark as Closed.
After that, in the Shortfall list tab, you can check the list of unreceived goods.
Note: that once the stock transfer has been marked as closed, you won’t be able to receive these items.
Your turn
In a nutshell, you can use Magento’s CSV importing feature, Bulk Inventory Transfer or Magestore solution to transfer items between warehouses.
If you’re looking for a solution to manage your inventory activities, especially inventory transfer, our solution will not disappoint you. How does this sound to you? Share with us and we’ll be happy to talk with you.
")

