
Magento 2 configurable product creates different variations of a product. It provides options from various menu types, such as multiple select, drop-down. Each combination of product options has a unique SKU, which it’s much more convenient to track down and manage inventory.
If you want to create configurable products in your Magento store but you don’t know how to do it, this article is truly for you. Without further words, let’s jump into it!
What is a configurable product in Magento 2?
Hold up…! Before creating a configurable product, it’s pretty crucial to know what exactly a configurable product Magento 2 is.
By default, Magento 2 offers 7 product types for store owners to sell products within the catalog. These types of product include:
- Simple product
- Configurable product
- Grouped product
- Virtual product
- Bundle product
- Downloadable product
- Gift card
In particular, a single product is a product which has only one single SKU (Store Keeping Unit). They are the most used product type in Magento 2 that can be sold individually or as part of a grouped, configurable, or bundle product.
When a product contains variations in format of a drop-down list or multiple select, it’s a configurable one. This type is the best choice for products with multiple options. For instance, customized socks with 4 color options and 2 types of logos is a configurable product.
In fact, it takes much time to set up, however, it brings lots of benefits in the long term. Because each variation is actually a single product with its own SKU, it’s simple for store owners to track and manage inventory.
Although there are many options that need setting up in order to create Magento configurable products, the procedure is not difficult at all. This step-by-step tutorial below will give you a clear guide to successfully complete the task with ease.
If you’re looking for a quick and straightforward tutorial on how to create configurable products in Magento, below is a short video with the latest method updated in 2024.
Part 1 – Create a Magento 2 configurable product
First, you need to add a new configurable product into your Magento store. Let’s start with 5 following steps:
Step 1: Choose the Magento product type
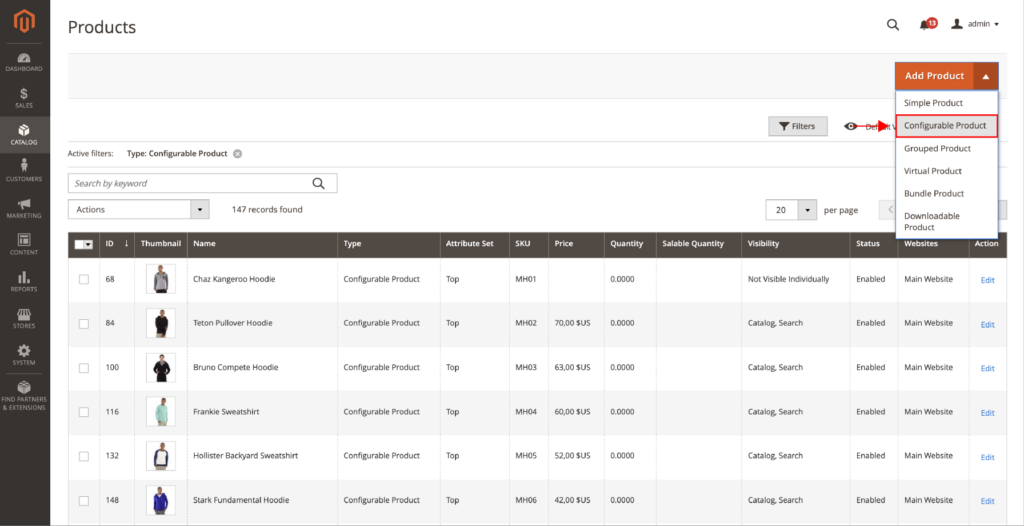
- On the Admin sidebar, navigate to Catalog > Products
- In the upper-right corner, click the drop-down menu of Add Product, select Configurable Product
Step 2: Select the attribute set
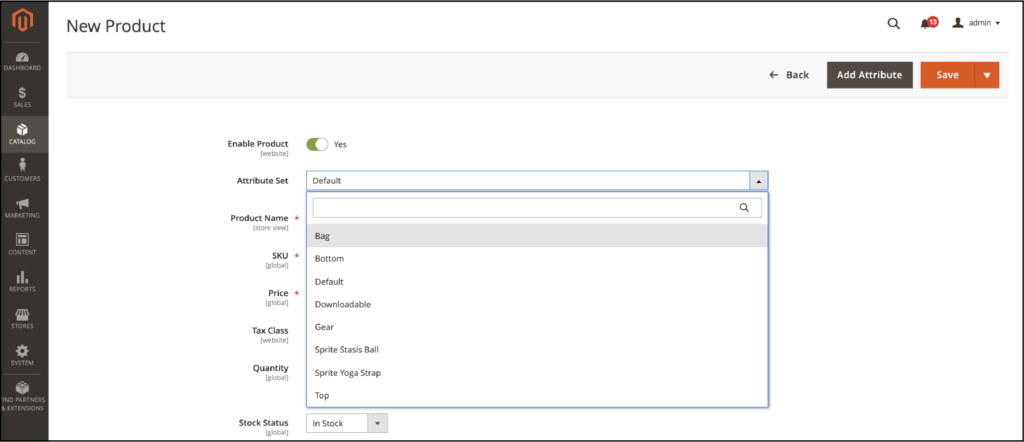
Adding variations to a product is the attribute set. You can click on the dropdown option to see the attribute set list, with Default as the initial setting.
To add the attribute set for the product:
- Type the name of the attribute set in the search bar
- Select the required attribute set from the list. You can see the updated form that reflects the change for each set.
In addition, you can add more attributes by clicking Add attribute and follow the instructions.
Step 3: Add the required product setting
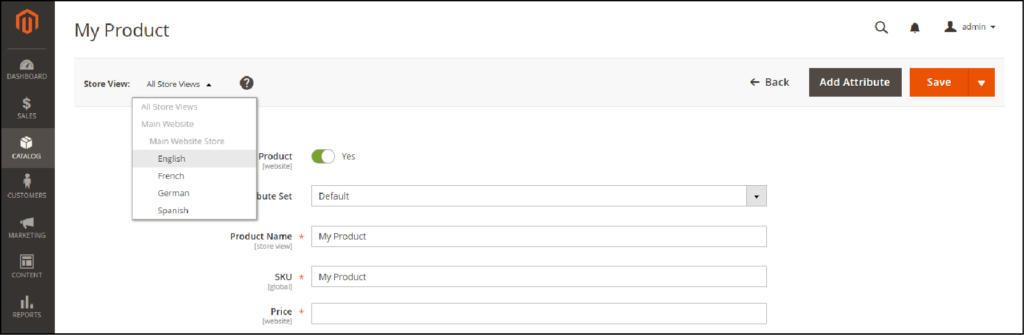
In this step, you need to add the required setting for the product:
- Enter the product name
- Accept the default SKU (based on the product name) or enter another
- Add the pricing for the product
- Select Enable Product to No (because it’s not yet ready to publish)
- Click Save and continue
- Select the Store View where the product will be displayed
Step 4: Add the basic setting
Don’t forget to add the basic setting for the product, such as tax, quantity, and also stock status:
- Set Tax Class to None or Taxable Goods
- The Quantity is identified by the product variations, you can leave it blank
- Set the Stock Status
Note: The Stock Status is created based on each product configuration. Because we can save the product without entering a quantity, the Stock Status is set to Out of Stock.
- Enter the product Weight
Note: A Magento 2 configurable product must have a product weight, so you need to add one. You may select This item has no weight from the drop-down list, however, after saving changes, it’ll automatically change to This item has weight.
Continue adding more basic setting for the product:
- Accept the default Visibility as Catalog, Search
- You can promote the new products by setting Set Product as New From, then provide the time range to feature them on your website.
- Add the Country of Manufacture
You can assign Categories to the product. To do that, click the Select box and do either of the following:
- Choose an existing category:
- Start typing in the box and find a match for the category
- Select the category you want to assign
- Create a new category:
- Click New Category
- Enter the Category Name to the bar. Select the Parent Category to set the product’s position in the menu
- Select Create Category button
Note: The product is described using a variety of qualities. The choice differs depending on the attribute specified. You can add other attributes later.
Step 5: Save changes
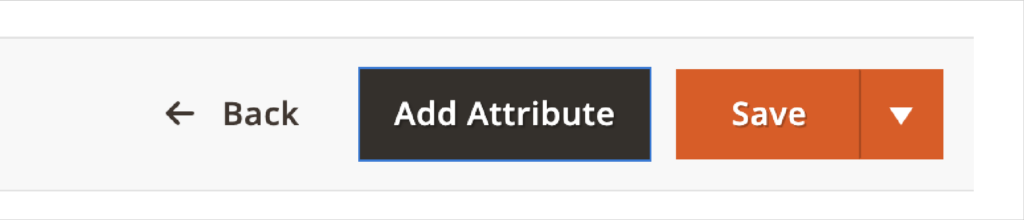
It’s a good time to save your work now. In the upper-right corner, click Save to save all the changes that have been made.
Then, scroll down for part 2 to continue setting up the Magento configurator for each product variation.
Part 2 – Add configurations in Magento 2
After creating a Magento 2 configurable product, you need to add all the necessary configurations like color, size. Let’s check out the 8 following steps.
Step 1: Choose the attributes

To set attributes for the product, navigate to the Configuration Section, then click on Create Configurations.
Tick the checkbox of the attribution you want to add. It can be the color and/or size of the product. In the following, we’ll guide you to config color and size attributes.
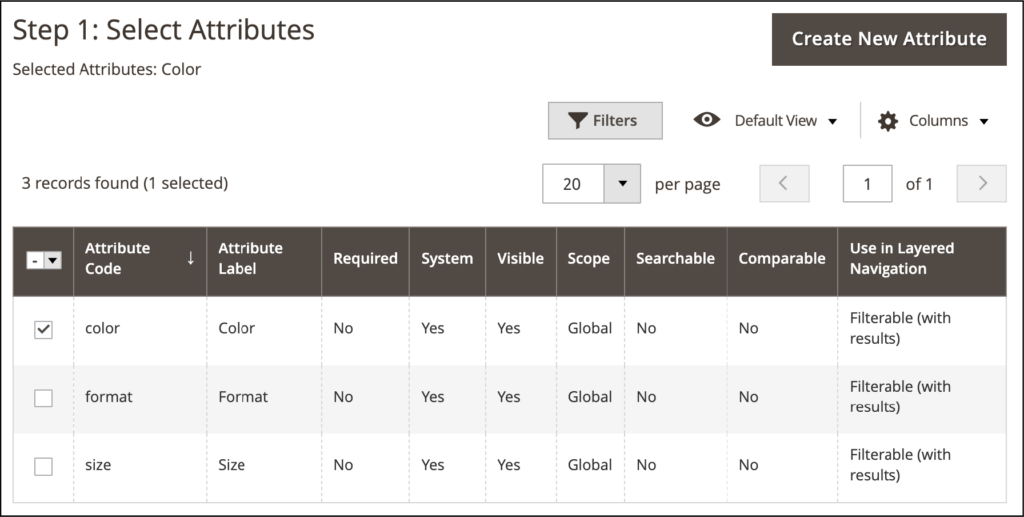
To add a new attribute, choose Create New Attribute and follow these steps:
- Fill in the attribute properties
- Click on Save Attribute
- Select the attribute by using the checkbox
- In the upper right corner, click on Next
Step 2: Enter the Attribute Values
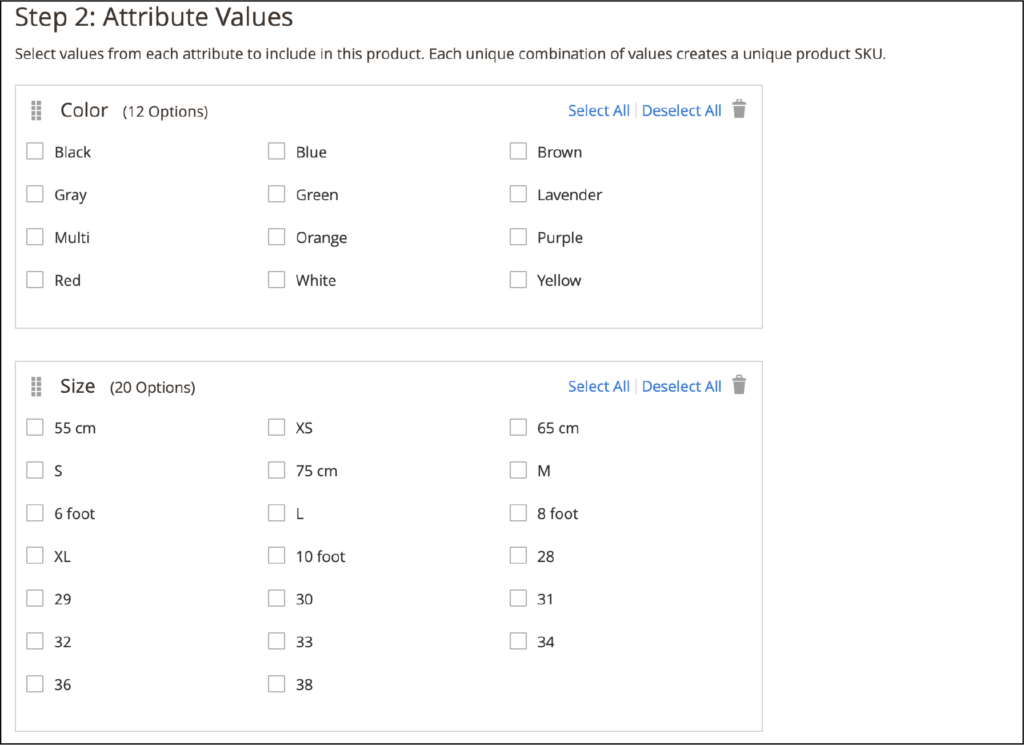
In this step, you’ll add the attribute values for the product size and color.
- Choose the values which fits best with the product
To manage how Magento 2 product options are shown in your product configurator, use the Change Order icon to reorder the attributes to your wish
Note: The order confirms the position of the drop-down lists on the product page.
- Click Next on the progress bar to move on to the configure price quote workflow while setting up the product variations.
Step 3: Configure the Product Images, Prices, and Quantity
Now, you’ll add prices, images, and quantity for each configuration.
Magento 2 allows you to add one setting to all SKUs or apply different settings for each SKU based on attribute. Let’s take a look at this table below:
| Configuration | Method 1: Add same setting for all SKUs | Method 2: Apply unique setting for each SKU |
| Product Images |  Choose Apply single set of images to all SKUsYou may either drag each image to the box or pick one in the product gallery. Choose Apply single set of images to all SKUsYou may either drag each image to the box or pick one in the product gallery. | 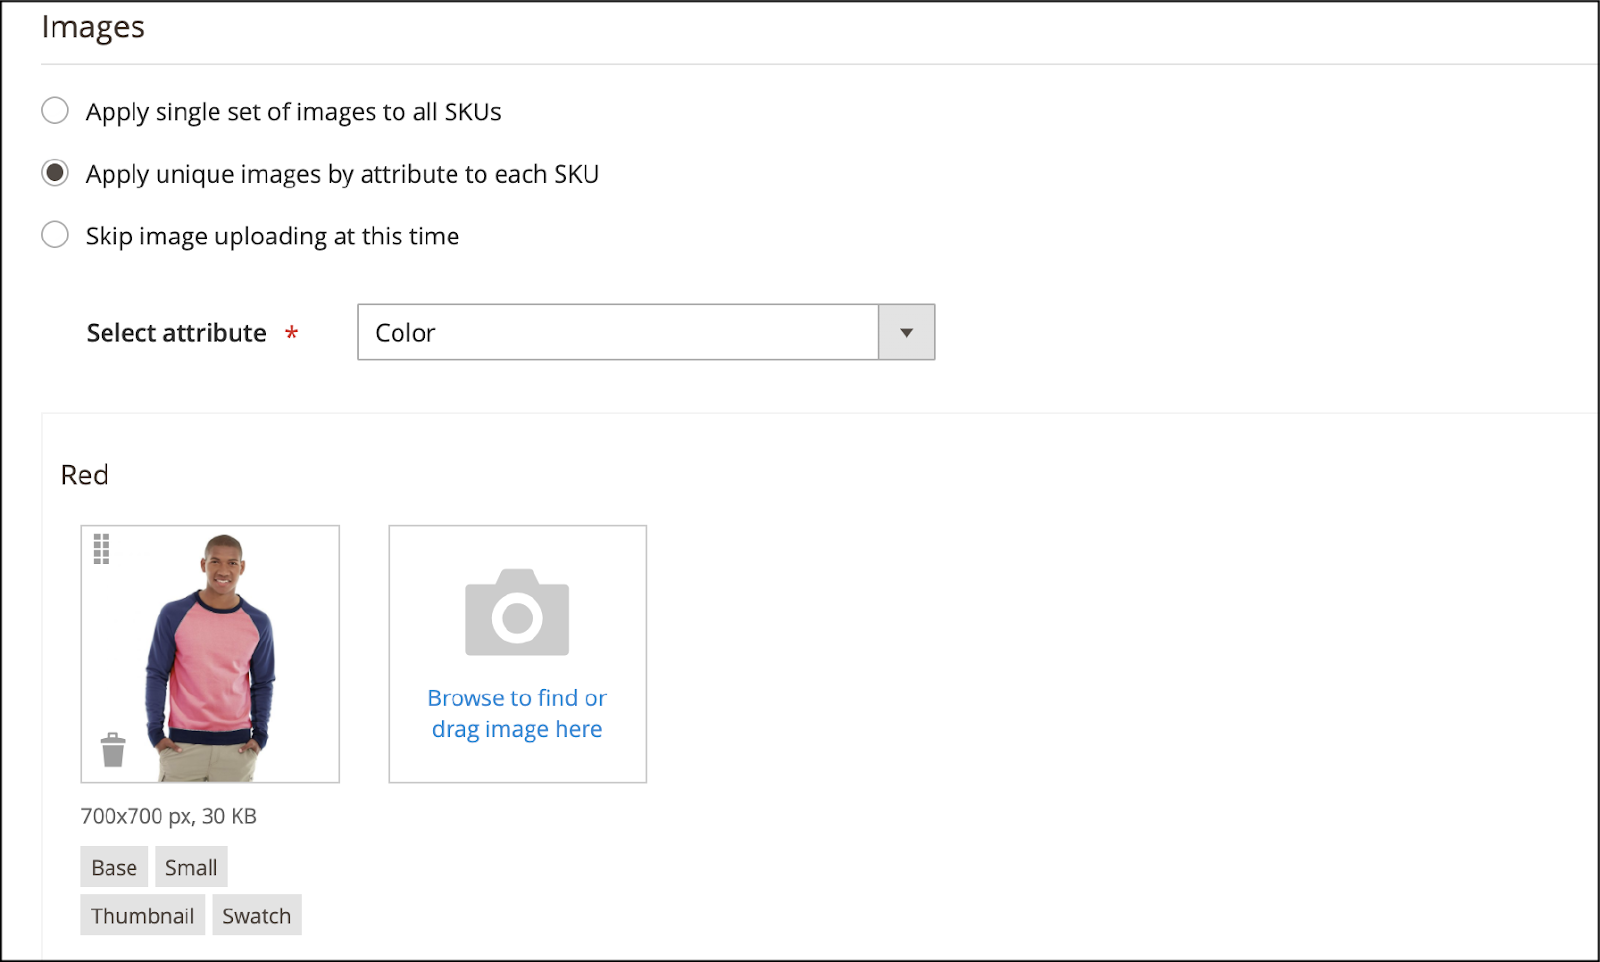 Choose Apply unique images by attribute to each SKUInclude the attribute for the visible imagesDrag the relevant photos to the box or browse the configuration’s unique imagesNote: If you want to delete an image, click the Trash can icon. |
| Product Prices |  Choose Apply different prices by attribute to each SKUChoose the attribute that specifies the price variationFor each attribute value, add the price | |
| Product Quantity |  Click on Apply single quantity to each SKUAdd the available Quantity Click on Apply single quantity to each SKUAdd the available Quantity | 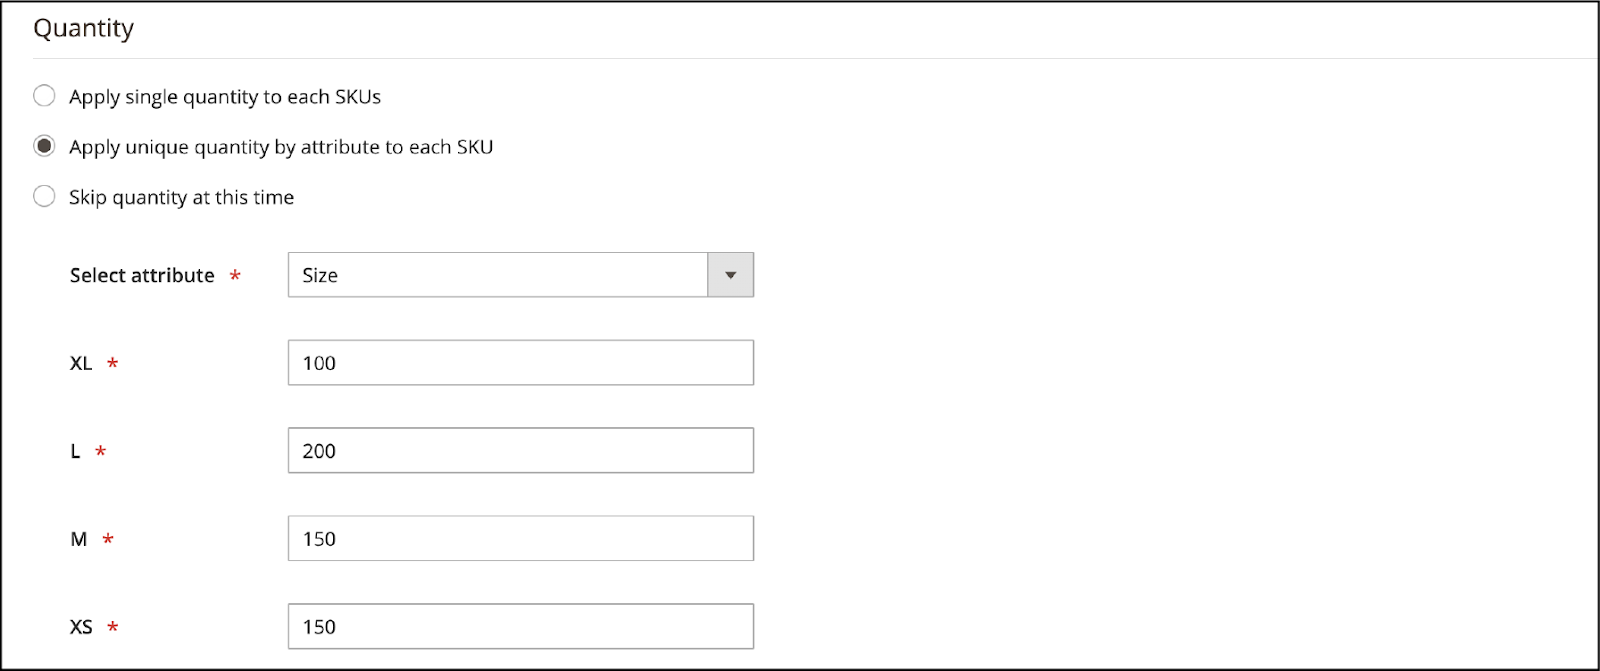 Choose the unique quantity for each SKU based on an attributeFor each variation, add the Quantity |
You need to make sure that the configuration for images, price, and quantity are complete. Then, click on Next in the upper-right corner to move forward to the next step.
Step 4: Generate product configurations
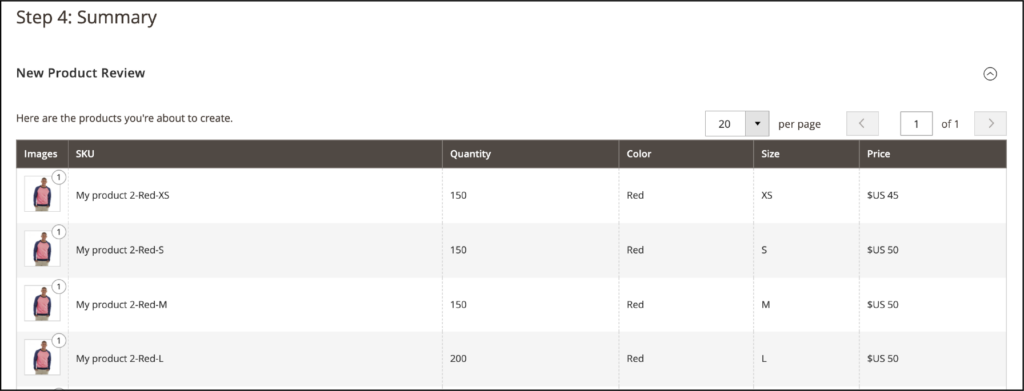
In this step, the list of products will appear.
If all the configurations are exactly as your needs, you can click on Next.
Otherwise, if you want to make corrections, click the Back button.
Step 5: Add product images
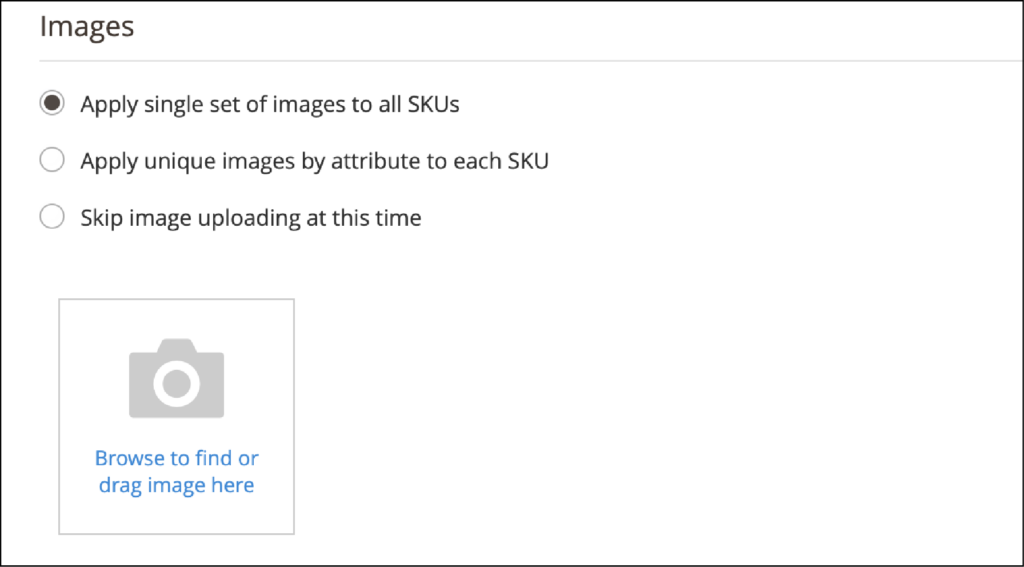
At the bottom, expand the section labeled Images and Videos, then you need to:
- Select the Camera tile
- Browse the configurable product’s image
- You can upload pictures and videos of the product from here.
Step 6: Add more product details
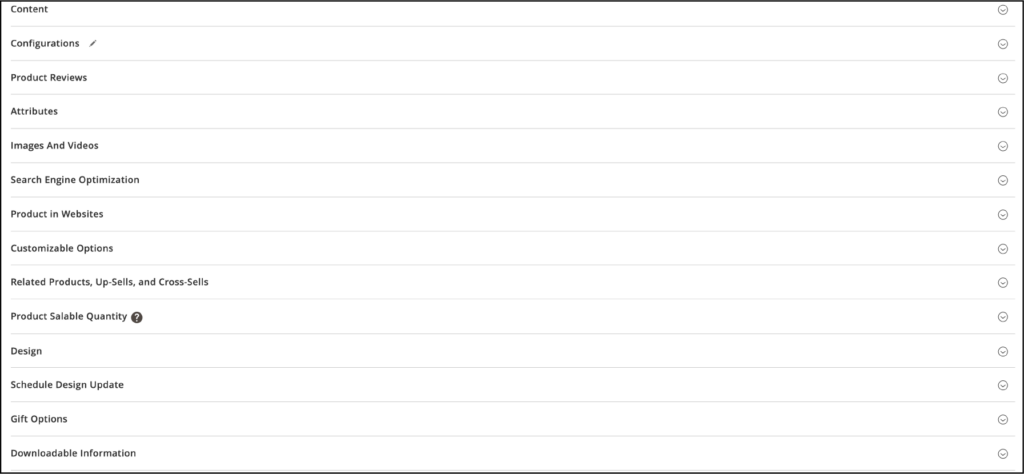
You can extend the product details by adding any of these sections:
- Content
- Design
- Cross-sells, up-sells, and related products
- SEO (Search Engine Optimization) with URL Key, Meta Title, Meta Keywords, Meta Description
- Products in Websites
- Customizable Options
Step 7: Publish the product
If you’re ready to publish your Magento configurable products, switch the Product Online to Yes. You can save and check the preview or just save and close the option.
Method 1: Save all changes and see the preview

- In the upper right corner, click the Save button
- On the Admin menu, click on Customer View to preview the product in the frontend.
Note: The preview will be displayed in a new tab.
Method 2: Save and close
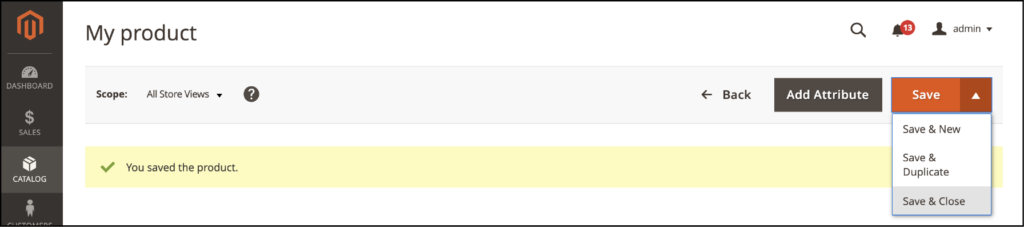
If you don’t want to preview at this time, just click on the Save button and close option to exit.
No matter which method you choose, remember to click on the Cache Management link in the system message to flush new cache and refresh the invalid cache.
Finally, on the Admin sidebar, click on Catalog > Products. Your new configurable product and its variations will appear in the grid at the top of the list.
Step 8: Configure cart thumbnails (Optional)
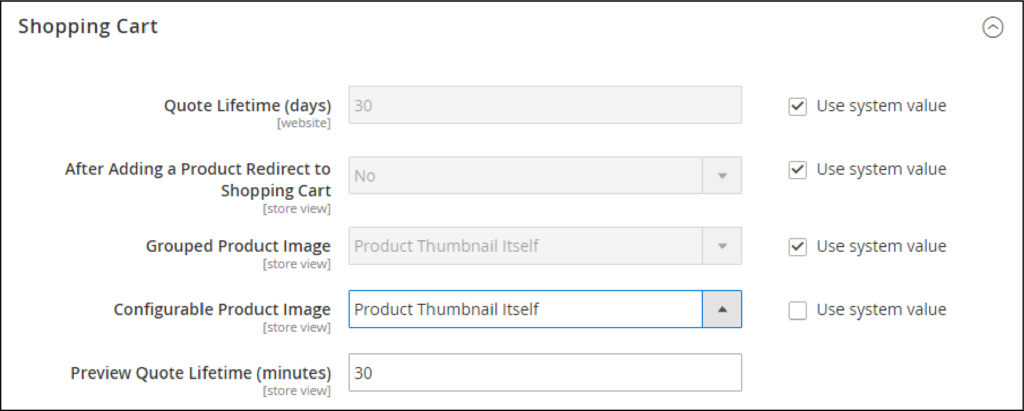
You may have different images for each variation, so you need to add settings to use the correct image for the shopping cart thumbnails.
You can do it by following this guide:
- On the Admin sidebar, go to Stores > Settings > Configuration
- On the left panel, click on Sales and choose Checkout
- Extend the Shopping Cart tab
- Add the configurable product image as the Product Thumbnail
- Click on the Save Config
Things to remember
- A configurable product is a simple product with multiple options chosen from a drop-down list, multiple select, visual swatch, and text swatch input types.
- The attribute set, which serves as a model for the customizable product, must contain the drop-down attributes and the unique features of the product variation.
- The attributes, which are used for product variations, must have a global scope, and the customer is required to choose a value.
- The image from the product variation can be chosen to display as the cart’s thumbnail image.
- Table grids can be used to present configurable products so that clients can compare alternatives more effectively and quickly to decide which one to buy.
Conclusion
Magento 2 configurable products help you sell and manage items with various attributes like colors, sizes which you may find inconvenient to do with single products.
We’ve walked you through the processes to create a new configurable product with required settings. And, it’s your turn! Get started now with the very first step: select the Product Type. However, going with a Magento 2 configurable product extension is a good choice if you don’t have much time to set up one by one.

")
