Hey developers,
It’s December and which event are you looking forward this month? For me, it’s the release of the beta version for Magento 2.0. I’m so eager to get it because “Magento2 will mark a turning point for how Magento works and will extend its place in the market!” (Mark Lavelle, VP Product and General Manager of Mid-Market & Magento at eBay). Wow, sound great!
While waiting for the beta version, we should waste no time and get started with the alpha one that I think its installation steps won’t change much. The guide is a little bit long but it’s surely worth your time reading 🙂
How to install Magento 2 on localhost XAMPP with composer
1. Install xampp
Before we can let Magento 2 store goes live we need to test and build it on local host first, the most stable localhost software to install Magento 2 is XAMPP and WAMP. In this tutorial, I will show you how to install Magento 2 on localhost XAMPP.
The first thing is you need to download localhost XAMPP software to your computer, this is the link from its homepage:
Access here to install Locahost XAMPP software.
Edit the file: php.ini to enable extensions as below:
| ;extension=php_openssl.dll ⇒ extension=php_openssl.dll ;extension=php_intl.dll ⇒ extension=php_intl.dll |
About how to install XAMPP, I don’t want to make this post too long so I don’t mention it here. It is very easy and I sure that all of you have already installed this software on your computer as a developer.
The next thing is installing composer!
2. Install composer:
Composer is the new thing in Magento 2, with composer,
Install composer via this link
Download file Composer-Setup.exe and install on localhost
Run the file Composer-Setup.exe
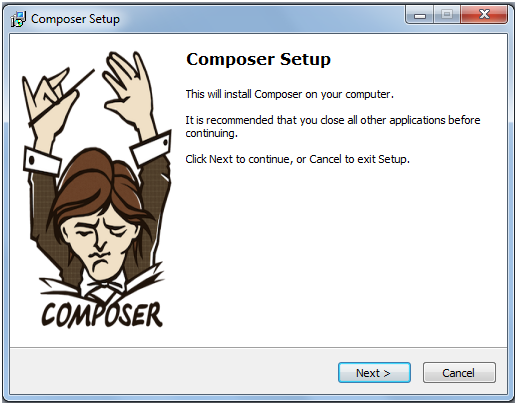
⇒ Choose Next to continue
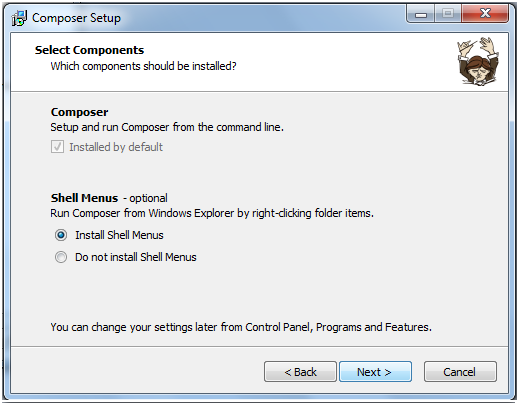
⇒ Choose Next to continue
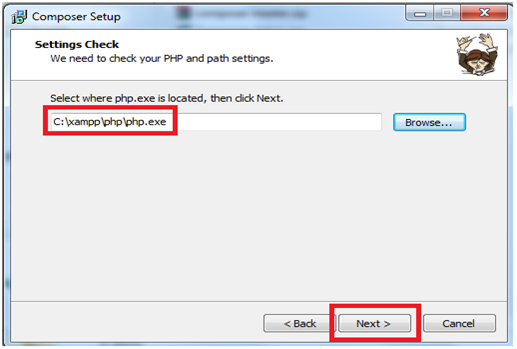
Choose the path where php.exe is located with xampp is C:\xampp\php\php.exe and click on Next
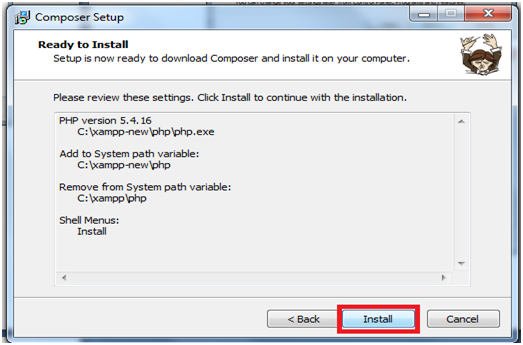
⇒ Select Install
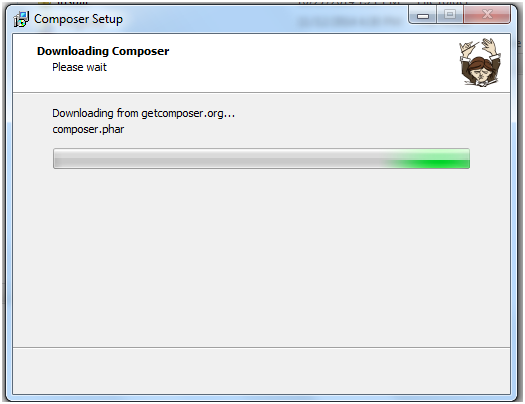
Then, please wait.
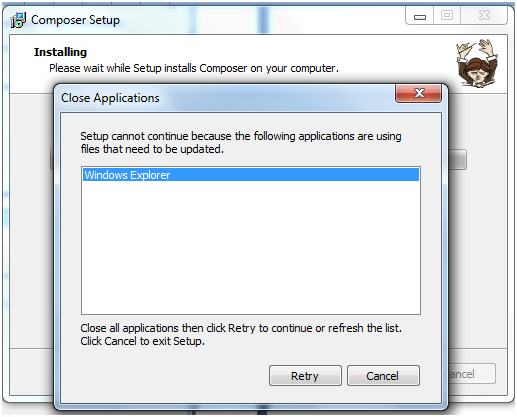
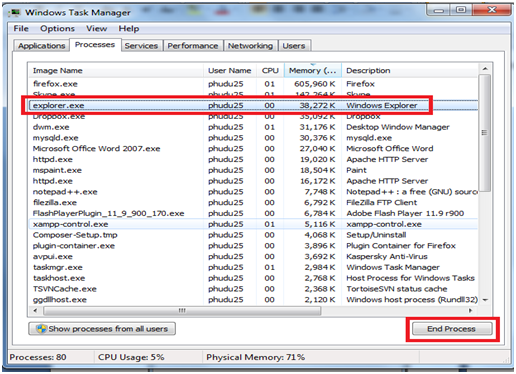
If this error happens, you can use Task Manager to close Window Explorer. Choose Retry to continue.
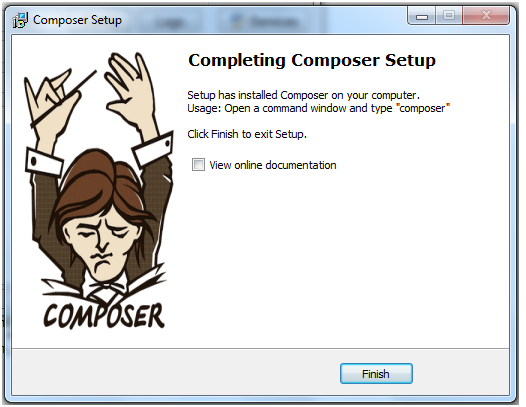
The composer installation process will end with the following window:
Run Window Explorer again:
3. Install Magento 2.0
In this post, I use Magento 2.0 code from https://github.com/magento/magento2
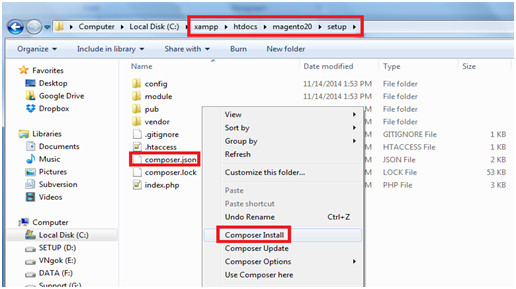
Copy the source code to htdocs folder of localhost. Then, right click and choose Composer Installation for the file \setup\composer.json
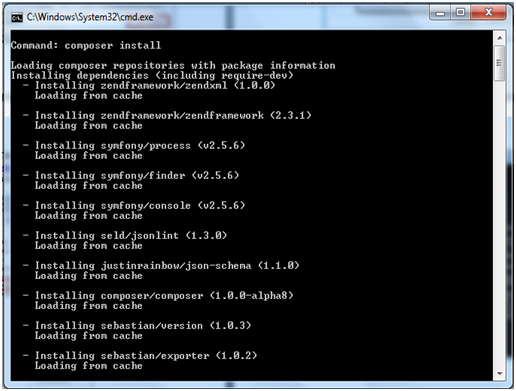
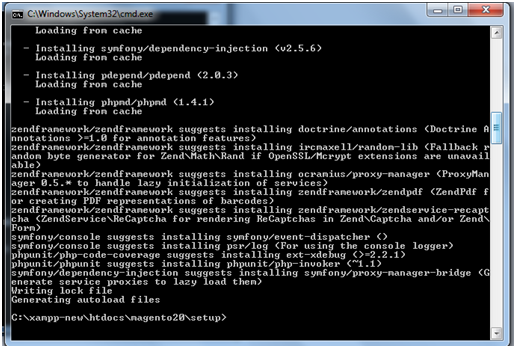
The cmd screen displays. You should wait for a while.
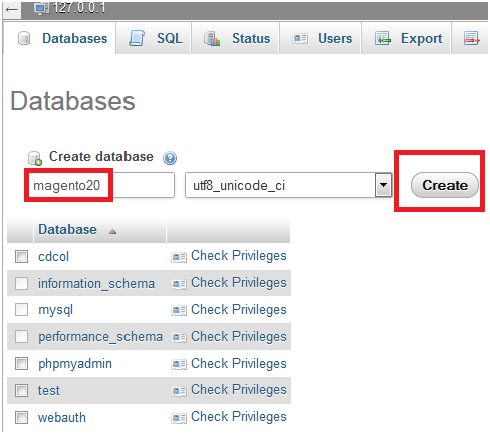
Log in to mysql to create database
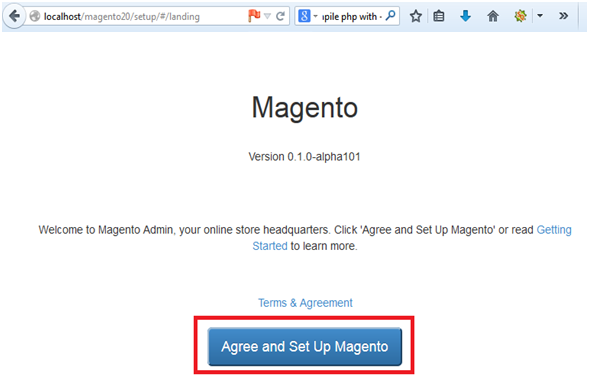
Run the link: localhost/magento20/ on the browser to start installing Magento 2.0
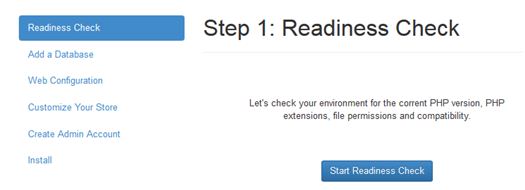
Installation runs. Follow step by step in this process:
Step 1: Check server
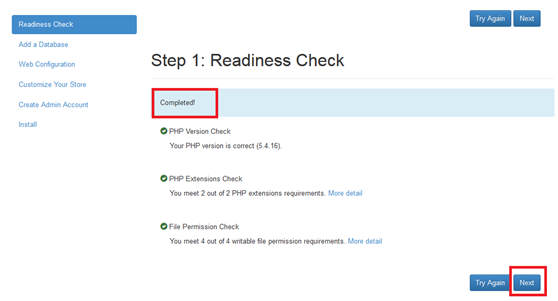
When Readiness Check step is completed, choose Next
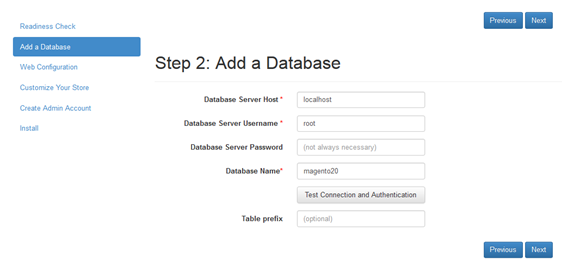
Fill in the information of server and database in step 2. After that, click on Next to continue
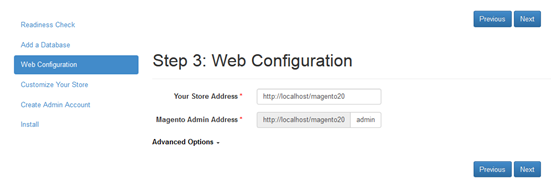
Step 3: Provide your website link and go on
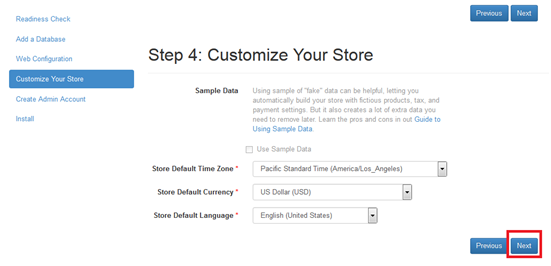
In step 4: Customize your store. You can edit your time zone, currency and language before going to the 5th step.
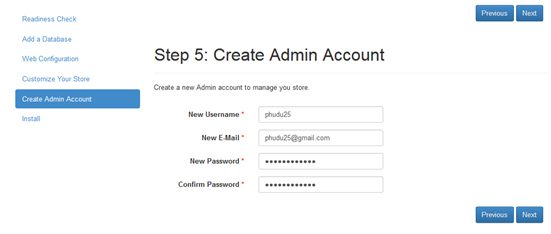
Step 5 requires you to Create Admin Account. Fill in the information, then move to the last one
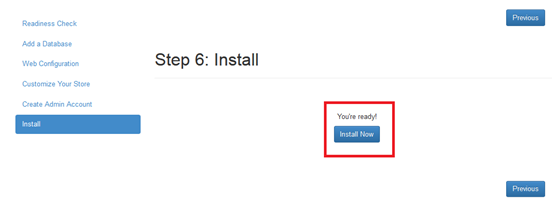
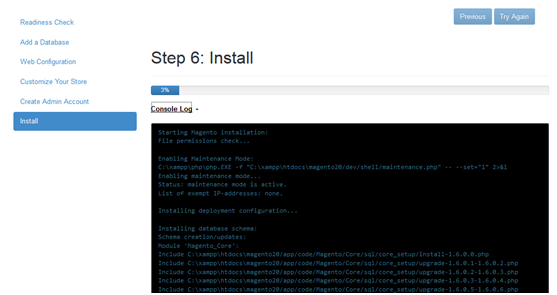
Choose Install in step 6, you will see the following screen
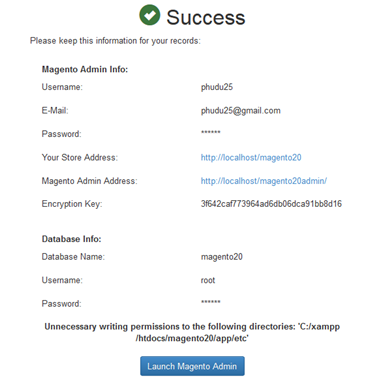
It will take some minutes to finish installation. The window will be shown as below when everything is done
Install Magento 2.0 on online server
1. Copy the source code to server
2. Run puty to install composer
i. Move to setup folder
| Cd folder_magento/setup |
ii. Download composer
| curl -sS https://getcomposer.org/installer | php |
iii. Run composer
| php composer.phar install |
3. Run Magento link. It’s the same as installing on localhost.
I hope that you’ll find this guide useful. If you have any problems or just want to share your thoughts about Magento 2.0, please contact us and we will discuss together.
We will update Magento tutorials regularly, especially about Magento 2. Let’s subscribe to our blog to be the first one catch up with the latest news by leaving your email below.
[mc4wp_form]





1 Comment
Today i download and install the magento2 but it give error
a:4:{i:0;s:71:”Unable to send the cookie. Maximum number of cookies would be exceeded.”;i:1;s:1491:”#0 C:\wamp\www\magento2develop\lib\internal\Magento\Framework\Stdlib\Cookie\PhpCookieManager.php(272): Magento\Framework\Stdlib\Cookie\PhpCookieManager->checkAbilityToSendCookie(‘X-Magento-Vary’, ”)
#1 C:\wamp\www\magento2develop\lib\internal\Magento\Framework\App\Response\Http.php(69): Magento\Framework\Stdlib\Cookie\PhpCookieManager->deleteCookie(‘X-Magento-Vary’, Object(Magento\Framework\Stdlib\Cookie\CookieMetadata))
#2 C:\wamp\www\magento2develop\var\generation\Magento\Framework\App\Response\Http\Interceptor.php(24): Magento\Framework\App\Response\Http->sendVary()
#3 C:\wamp\www\magento2develop\app\code\Magento\PageCache\Model\App\Response\HttpPlugin.php(22): Magento\Framework\App\Response\Http\Interceptor->sendVary()
#4 [internal function]: Magento\PageCache\Model\App\Response\HttpPlugin->beforeSendResponse(Object(Magento\Framework\App\Response\Http\Interceptor))
#5 C:\wamp\www\magento2develop\lib\internal\Magento\Framework\Interception\Interceptor.php(122): call_user_func_array(Array, Array)
#6 C:\wamp\www\magento2develop\var\generation\Magento\Framework\App\Response\Http\Interceptor.php(104): Magento\Framework\App\Response\Http\Interceptor->___callPlugins(‘sendResponse’, Array, Array)
#7 C:\wamp\www\magento2develop\lib\internal\Magento\Framework\App\Bootstrap.php(258): Magento\Framework\App\Response\Http\Interceptor->sendResponse()
#8 C:\wamp\www\magento2develop\index.php(39): Magento\Framework\App\Bootstrap->run(Object(Magento\Framework\App\Http))
#9 {main}”;s:3:”url”;s:17:”/magento2develop/”;s:11:”script_name”;s:26:”/magento2develop/index.php”;}