In the omnichannel retail business, some merchants want to separate products, prices, customers, promotion, language, and currency between different locations/outlets and online websites.
As of August 2019, this feature is supported in Magestore POS Professional and Enterprise editions.
You can do this by creating multiple Websites on Magento. After that, link the POS Location to the Store View of the Website.
Configure master data for offline channel
If you haven’t configured multiple websites, please follow these steps:
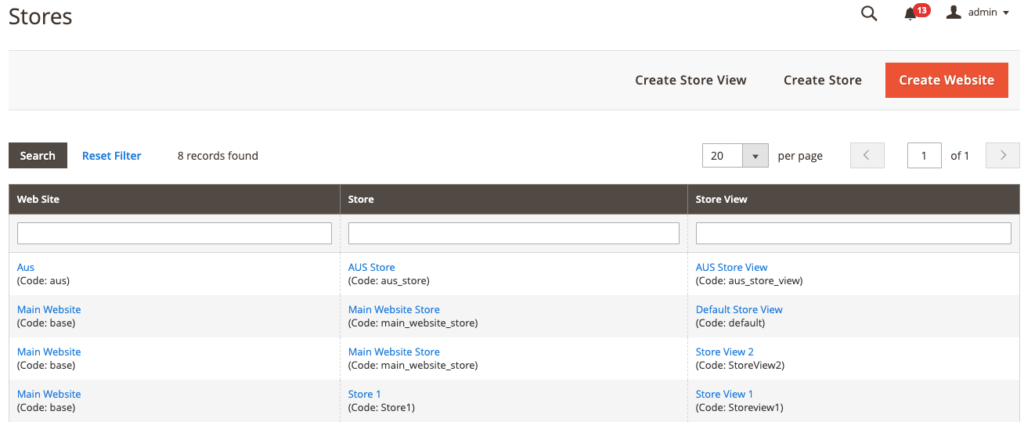
Step 1: Create Website, Store, and Store View, which will be linked to the POS:
You can follow Magento’s instructions.
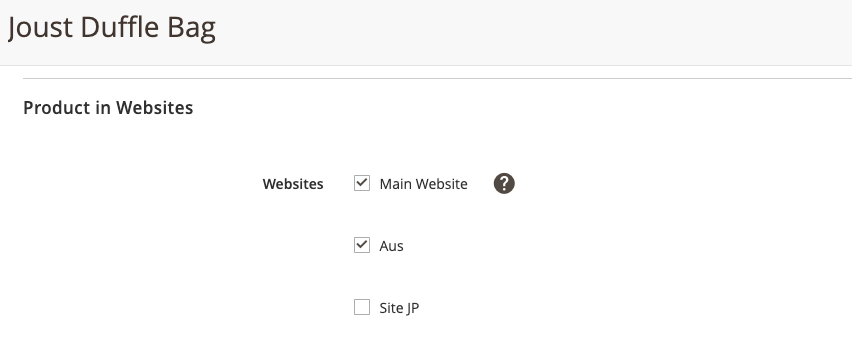
Step 2: Add Product to the new Website:
To sell the items on POS, they need to be added to the website AND the stock of that POS location. There are three options for you to add products to a website:
- Option 1. Add product individually (please follow Magento’s guide)
- Option 2. Add products in bulk:
- Go to Catalog > Product;
- In the product grid, select the products you want to add to that website;
- In the Action dropdown menu, select Update Attribute;
- Under Websites, select the website you want to add the product to.
- Option 3. Import products using CSV file (you can check out Magento’s guide)
A note about product category: If you want to set up separate categories for each website, you can set up a new root category. After this, assign the new category to the Store of Store View (please follow Magento’s guide).

Configure additional data for offline channel
You can also configure additional data for your POS such as language, currency, promotion, etc.
To do this, please set up data for the Store View/Website which you have created in the above steps.
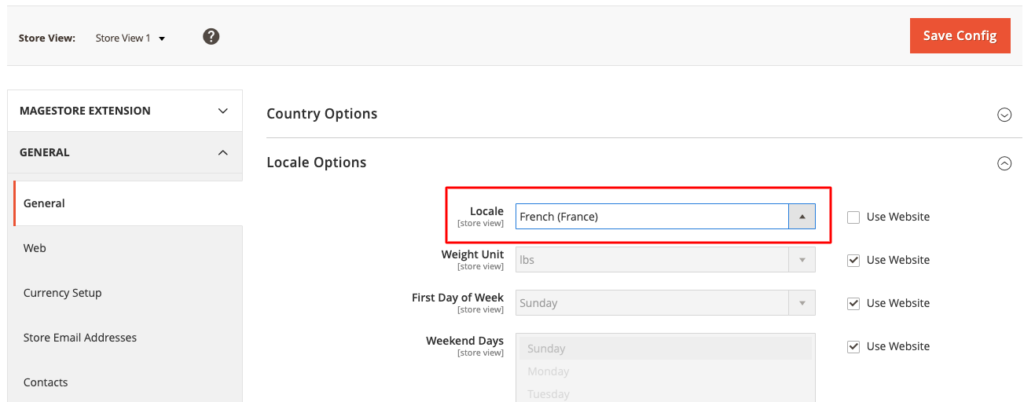
- Configure language: Magestore POS will use the default language of your Magento site. To change this, you’ll need to set up the language of Store View. Please follow Magento’s instructions.
- Configure currency and rate: Magestore POS uses the default currency of the Magento site. To change POS currency and rate, you’ll need to set up the currency and rate of Store View. Please follow Magento’s instructions.
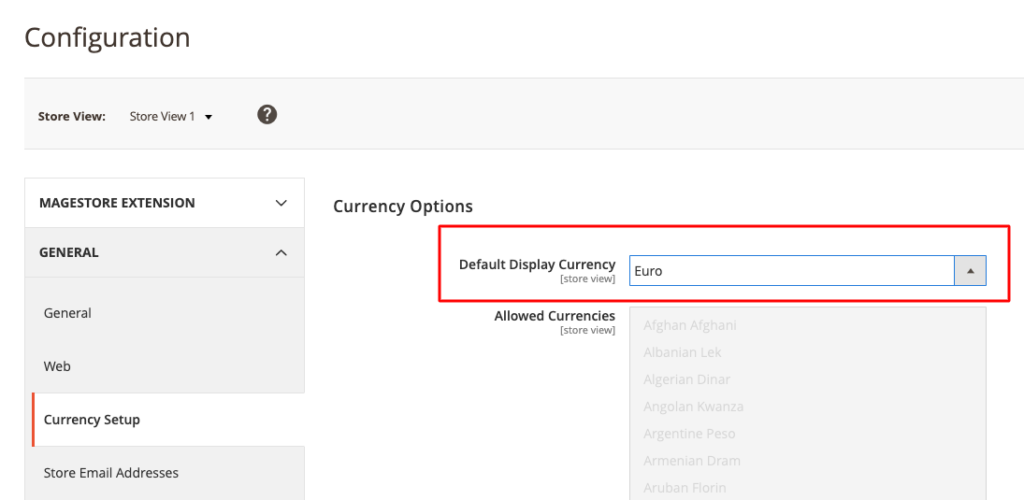
Configure currency for Store View
- Configure Customer Scope: Magestore POS inherits Magento’s customer scope. By default, Magento limits customer account information to the website where the account was created. You can change customer scope to Global to share accounts across websites and POS.
- On the Admin sidebar, tap Stores. Then under Settings, choose Configuration.
- In the panel on the left, under Customers, choose Customer Configuration.
- Expand the Account Sharing Options section.
- Change the value in the dropdown to Global.
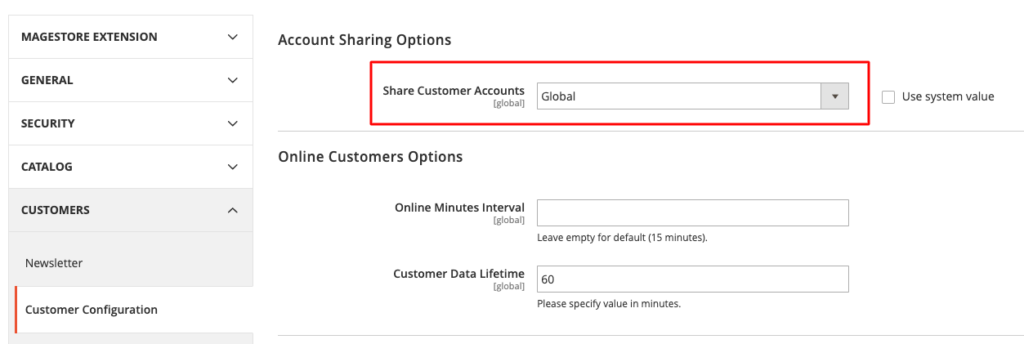
Change the scope of Customer Account sharing
- Change display product name on POS: you’ll need to change the product name in the linked Store View. Please follow Magento’s instructions.
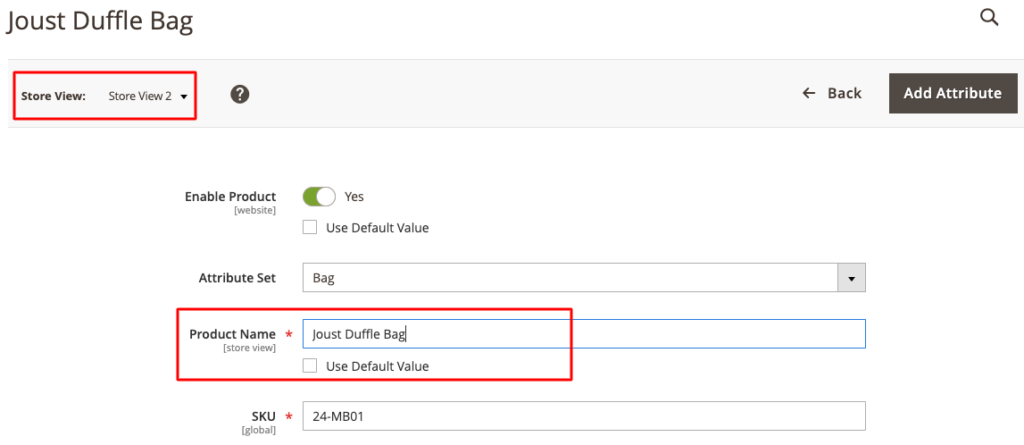
Change the product name in Store View
- Configure Product Price: by the default, the scope of product price is Global. That means the price is the same across all sales channels (online website & POS). If you want to set up different product prices for different sales channels, you’ll have to change the price scope to Website, then change the price by the Website.
- On the Admin menu, tap Stores. Then under Settings, choose Configuration.
- In the panel on the left under Catalog, choose Catalog.
- Scroll down to the Price section. Then, set Catalog Price Scope to Website.
- When complete, tap Save Config.
- Then go to each product under Catalog > Products menu;
- Choose the specific Store View, then change the value in the Price field as well as Advanced Pricing.
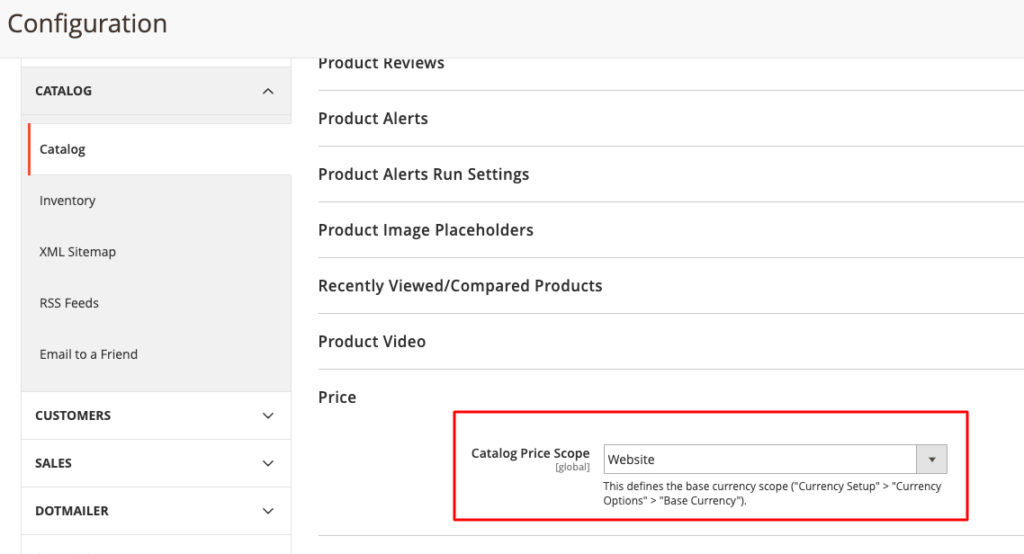
Change the scope of product price to website
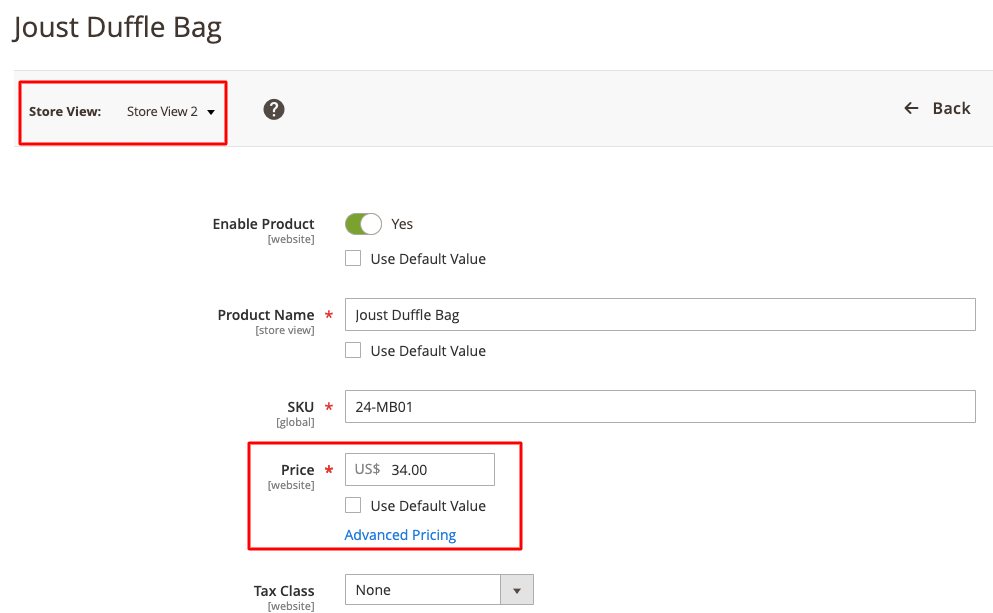
Set up different product prices by websites
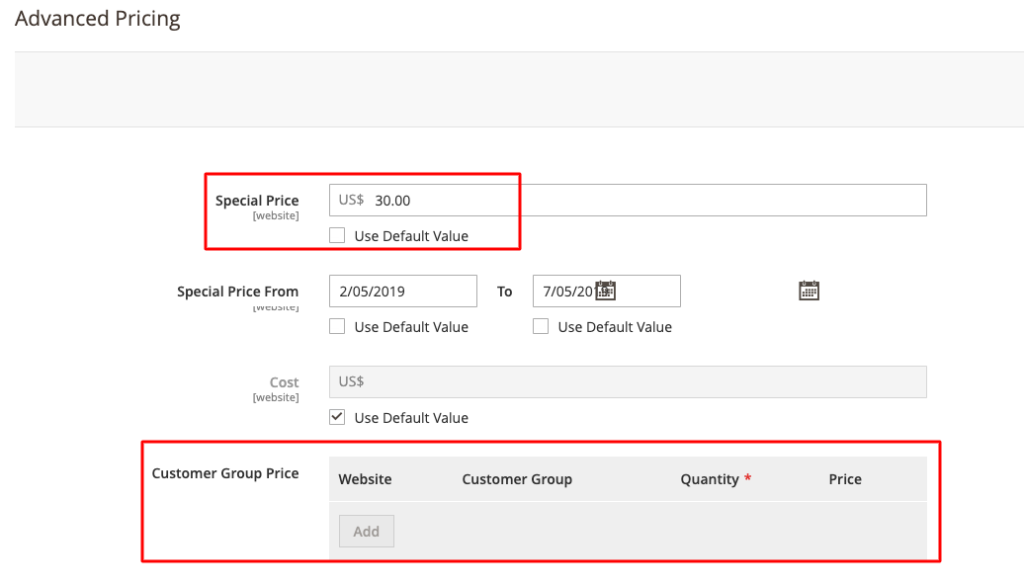
Set up special price & tier price by website
- Configure Promotion: Magestore POS inherits promotion rules from the linked website. To apply for specific promotions on POS, please follow Magento’s instructions on creating promotions for that website.

Create catalog promotion rule
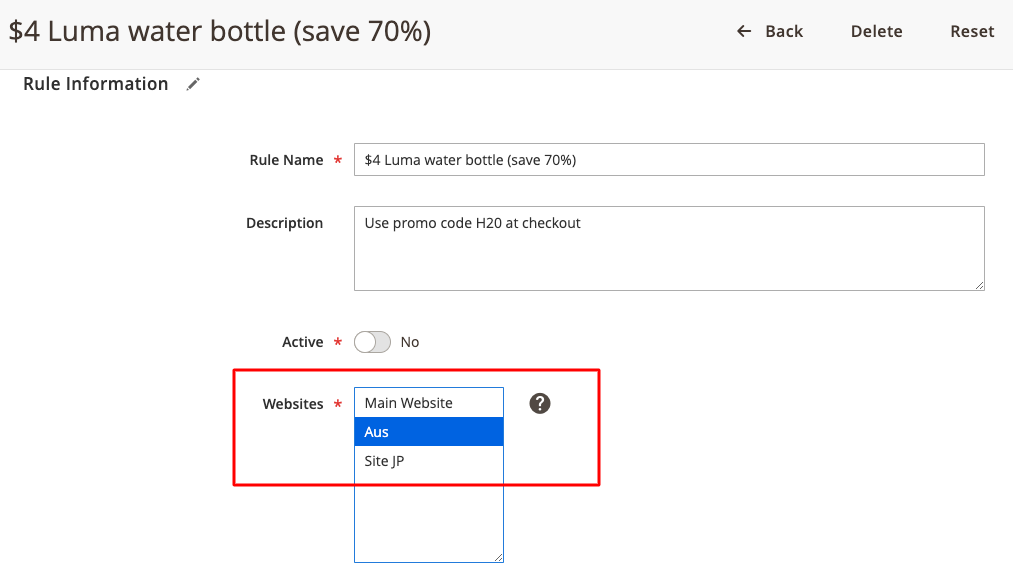
Create shopping cart promotion rule
Link POS Location (offline channel) to specific Store View
When your configuration is complete, the final step is to link the POS location with the store view. This ensures that the POS will inherit the correct settings from the linked store view.
Check data on your POS
After finishing all the steps above, you should log in to your POS and check the data displayed on POS (language, currency, product list, product price, promotions, etc.) to make sure that it has been set up as you need.
Conclusion
Setting up multiple Magento store views is the very first step to bring delightful omnichannel shopping experiences for your customers. Let your customers shop in their preferable ways and entice them to make more purchases. Happy selling.